Using Testdisk to recover partitions
Overview
Windows
CautionThis will wipe all existing data on the USB drive.
- Download and run Rufus.
- Select “ISO Image” and then browse for the ISO image.
- Select which flash drive you want to put the installer on.
- Select the Partition scheme (GPT/MBR) depending on your motherboard’s capabilities.
- Click “Start” and wait for it to finish.
- Eject the USB flash drive.
There is no need to mess with any other settings in Rufus.
macOS
- Open the Terminal.
- First, without the flash drive inserted, run
diskutil listin the Terminal. - Plug in the flash drive and run
diskutil listagain. You can do this to identify the drive device path. The device path is in the form of/dev/diskN, where N is a number (example:/dev/disk1). - Unmount the flash drive you have identified.
diskutil unmountdisk /dev/diskN. - Convert the ISO image.
hdiutil convert /path/to/image.iso -format UDRW -o /path/to/ubuntu.img - Run
sudo dd if=/path/to/image.img of=/dev/rdiskN status=progressto create a bootable drive from the image. Using/dev/rdiskNinstead of/dev/diskNusually results in faster media creation. - Wait until dd finishes. The terminal will display the next prompt when it’s done.
- Eject the USB flash drive:
diskutil eject /dev/diskN.
Linux
- First, without the flash drive inserted, run
lsblkin the Terminal. - Plug in the flash drive and run
lsblkagain. You can do this to identify the drive device path. The device path is usually in the form of/dev/sdX, where X is a letter (example:/dev/sdb). - Run
dd if=/path/to/image.iso of=/dev/sdX status=progressto create a bootable drive from the ISO. - Wait until dd finishes. The terminal will display the next prompt when it’s done.
Ventoy (Windows and Linux)
Follow our Ventoy guide to make one flash drive that can boot multiple ISO files, this is a more advanced method but suitable for power users who may not have heard about it before.
Make a disk imageAttempting data recovery always has a chance to make your situation worse, causing the permanent loss of your data.
For priceless data you should seek professional data recovery services.
Always make a disk image before attempting recovery of data on a disk. You may need to restore this image to the disk between data recovery attempts.
Before attempting data recovery you should evaluate the SMART data for your disk. If it is failing data recovery may stress the disk and cause a complete failure.
This guide was written using a Windows 11 host that has a 128GB C:\ drive and a 256GB D:\ drive called “Game_Data”.
Using Testdisk
-
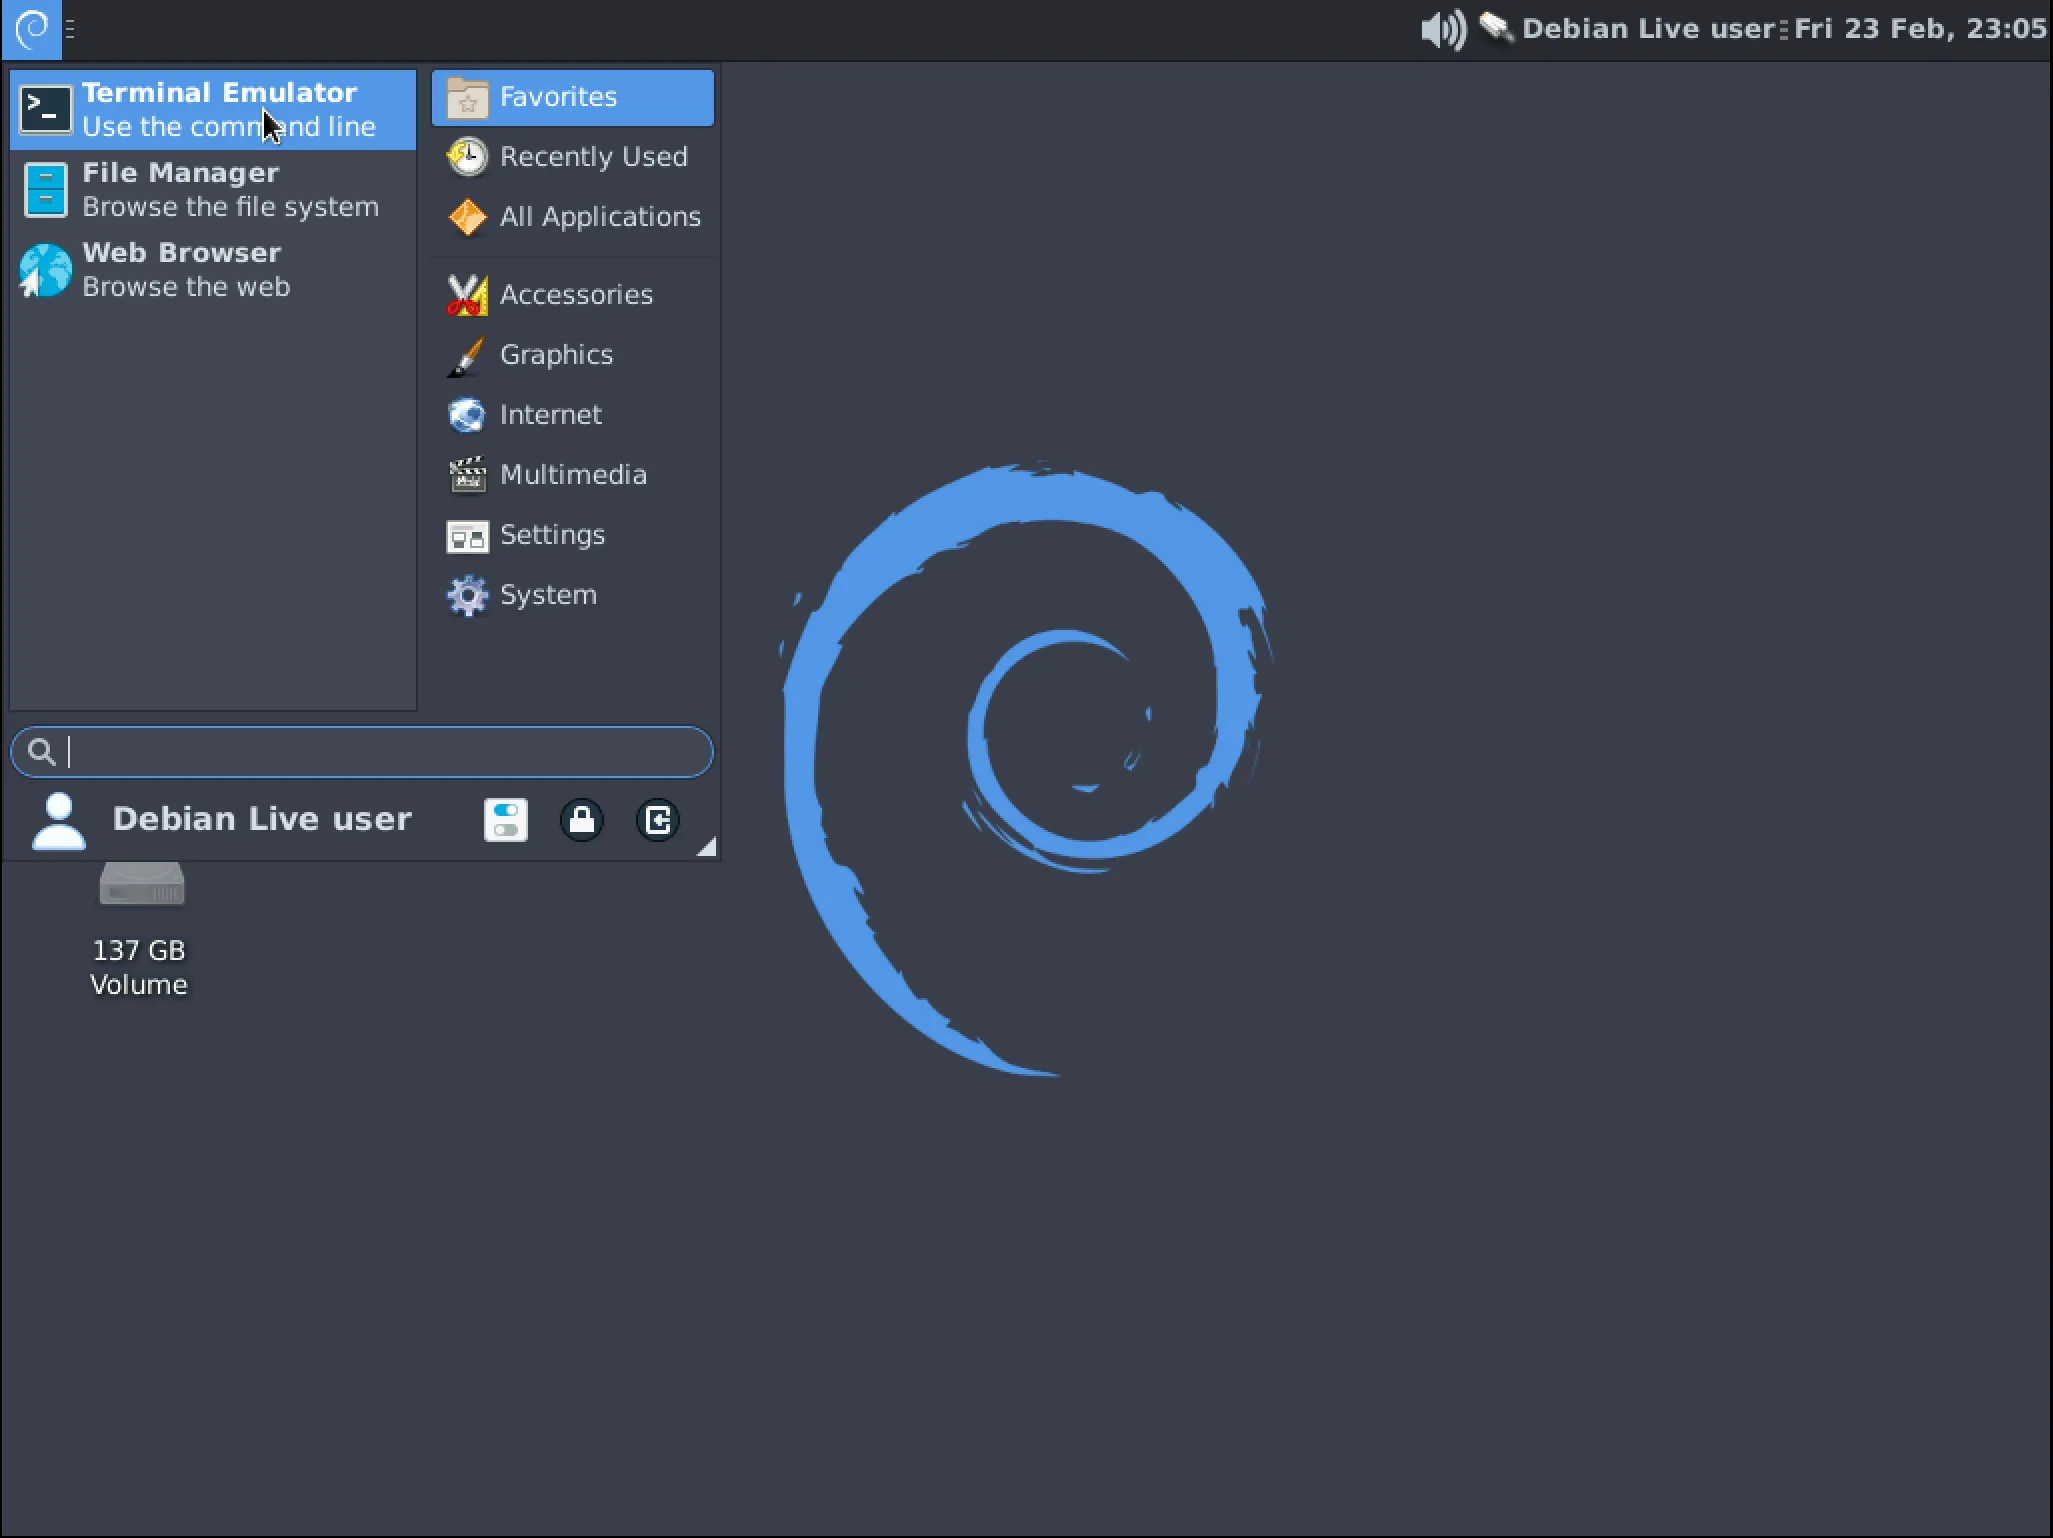
From the Live media desktop click the application menu in the top left and open “Terminal Emulator”
-
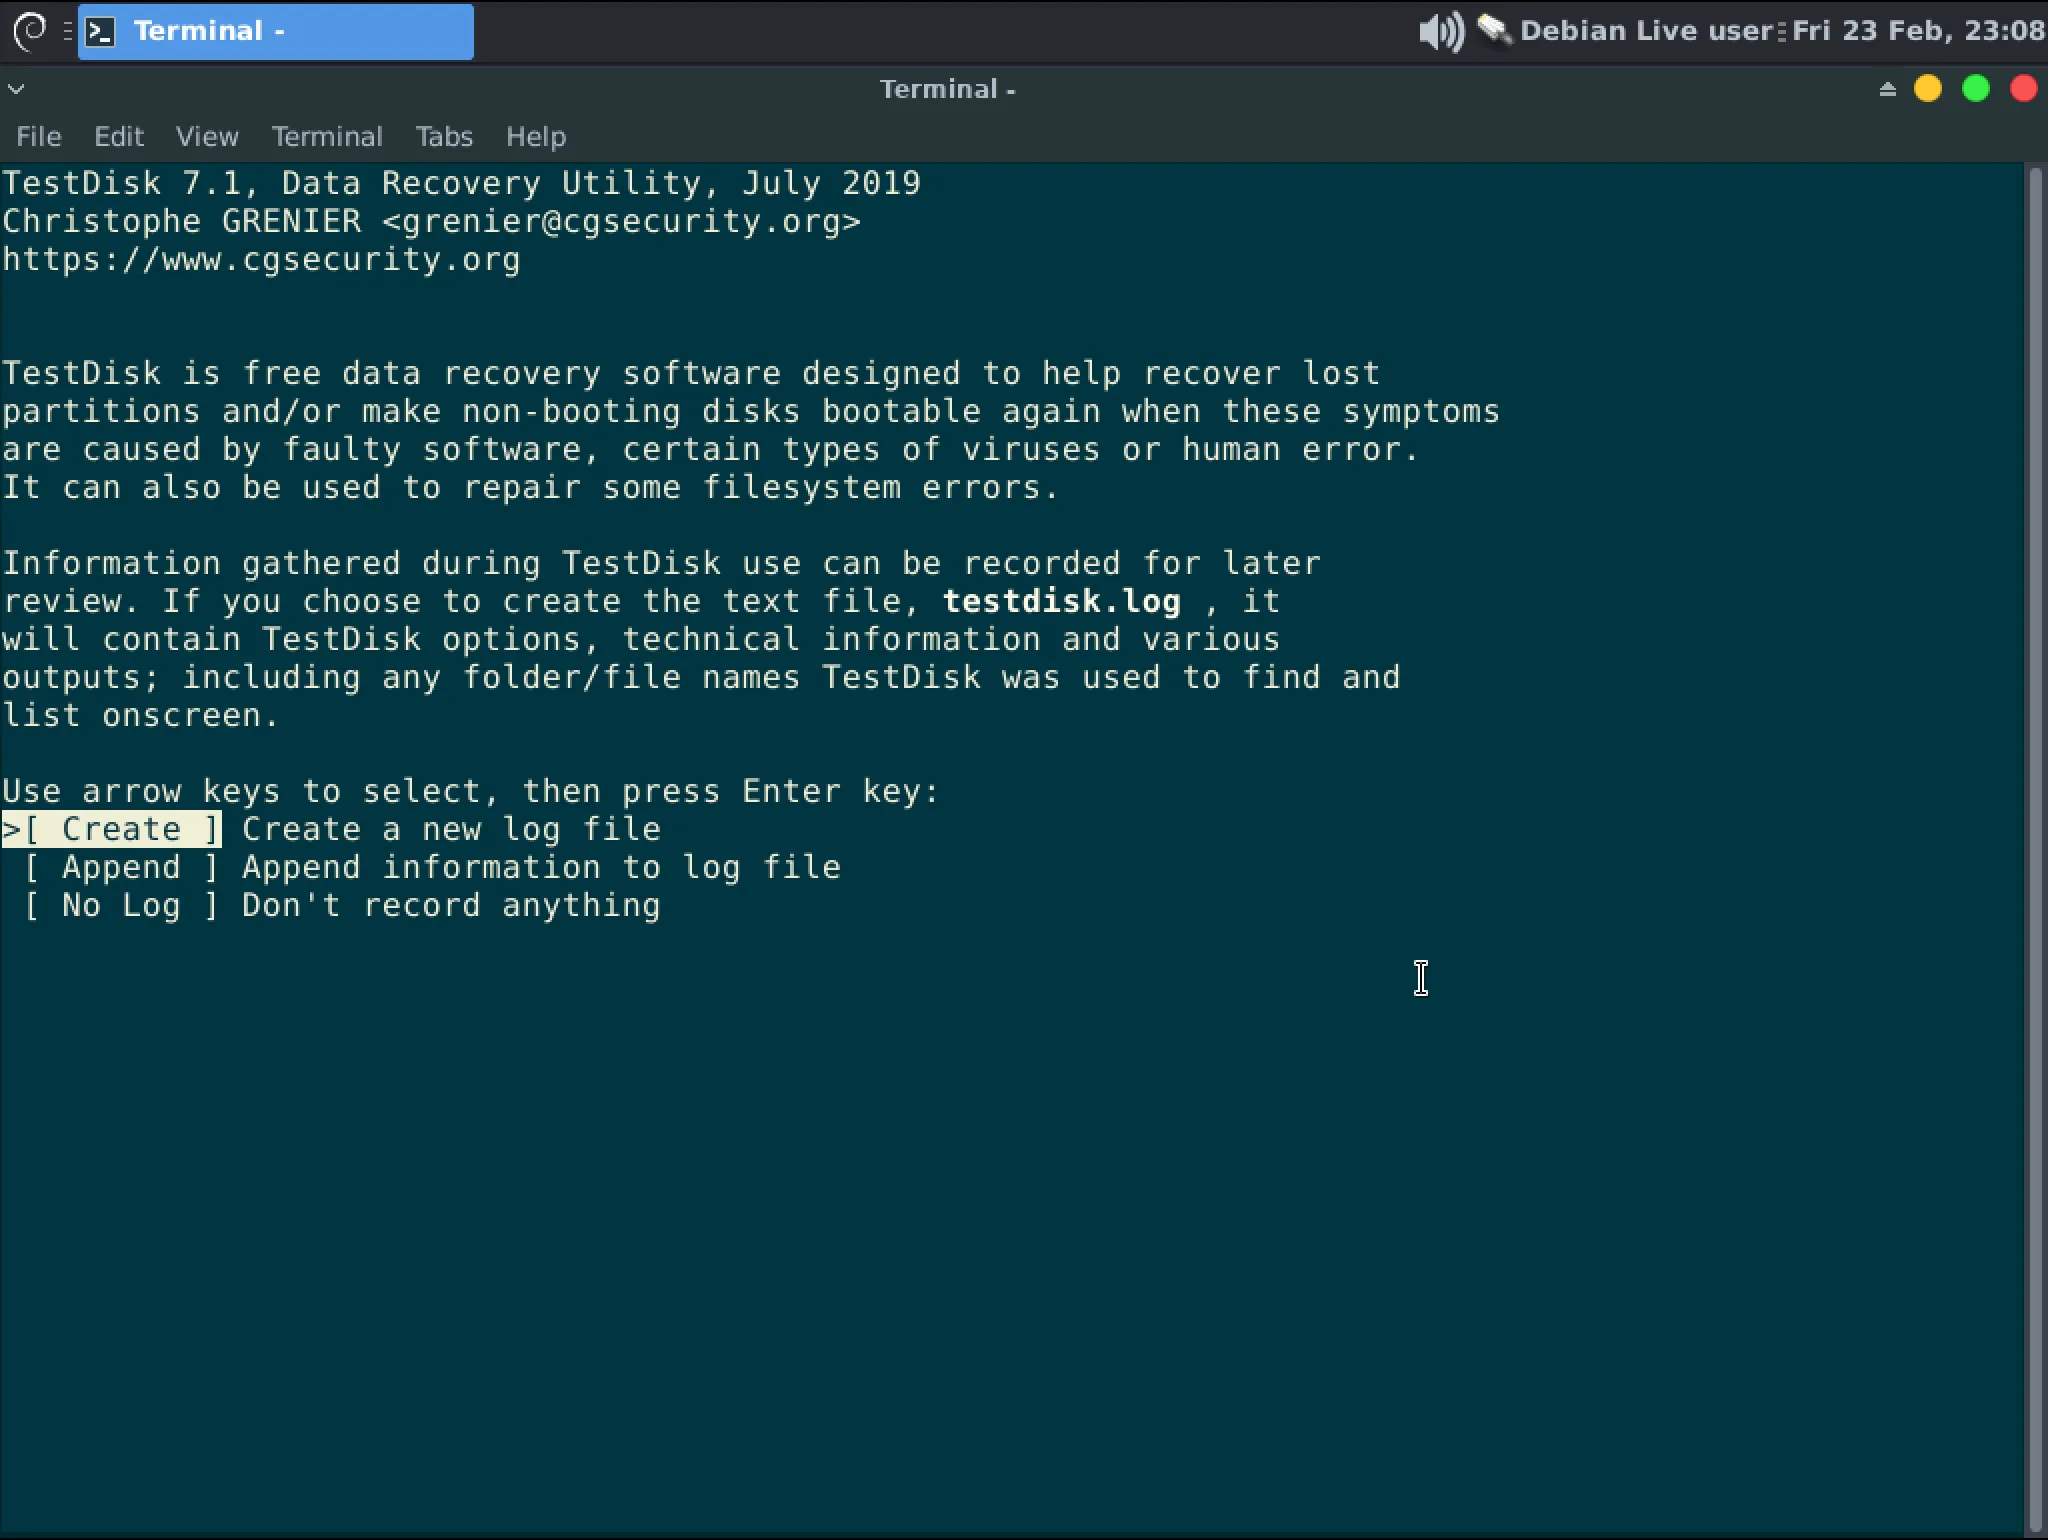
In the terminal type “testdisk” to start the application. Use the arrow keys to select “No Log” and hit Enter.
-
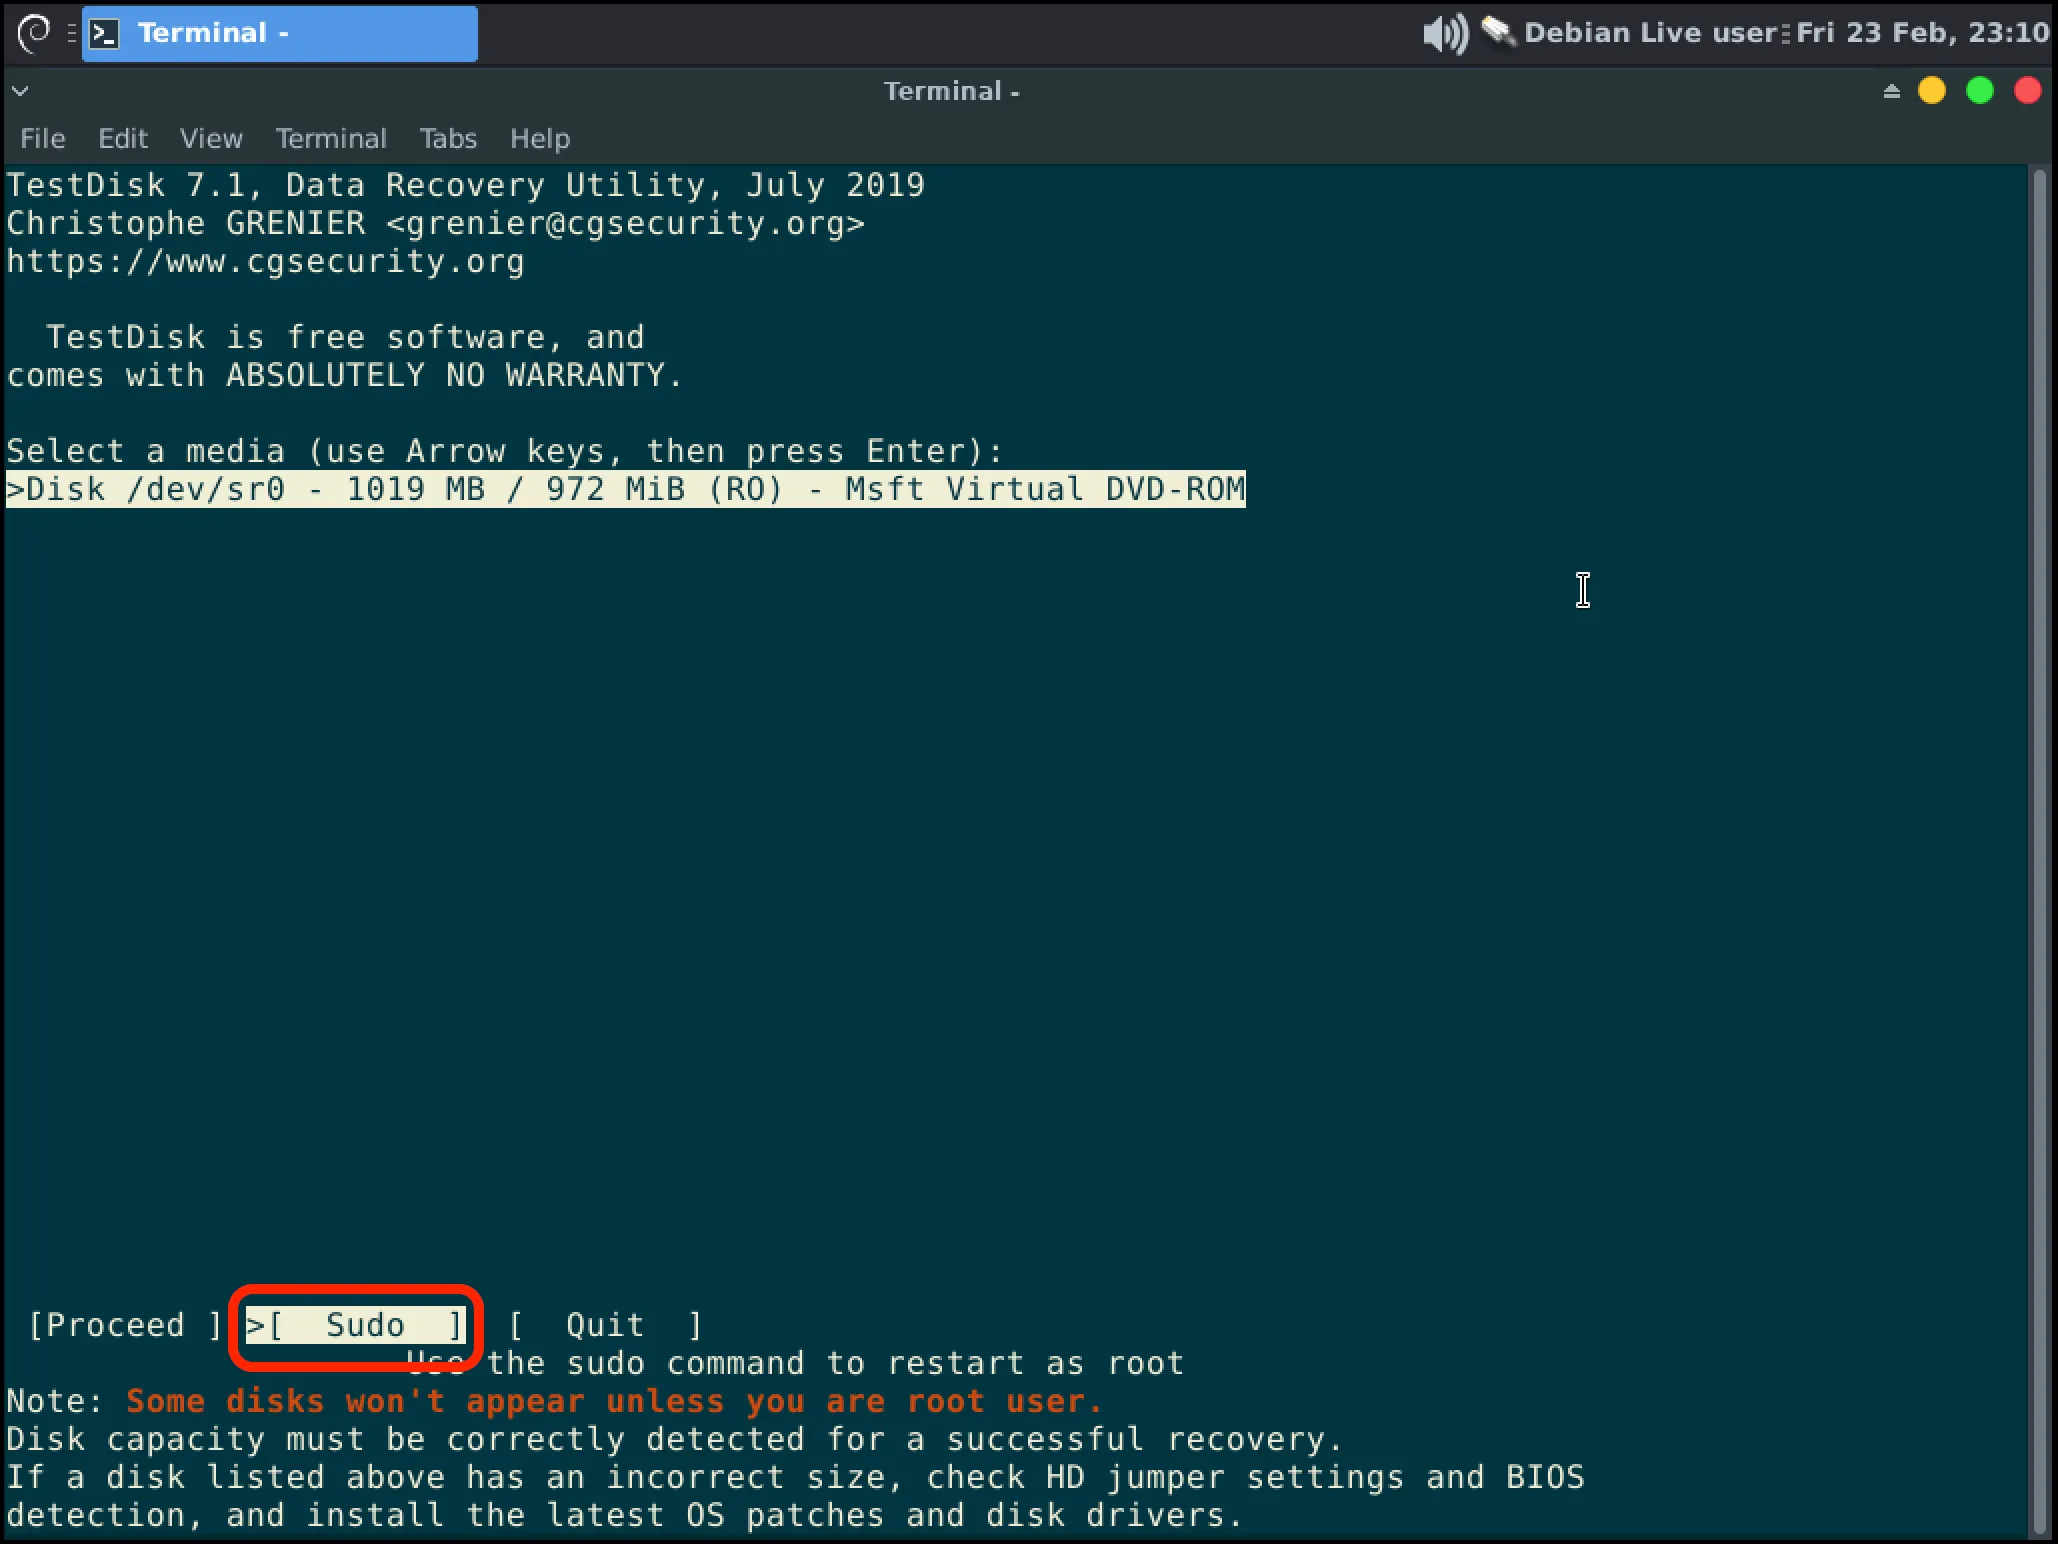
When Testdisk opens you will see a list of disks, most likely you will only see your USB though. Use the arrow keys to highlight and select “Sudo” with Enter to load more disks.
-
You should now see all possible disks. You will use the Up and Down arrows to select the disk you want to operate on then hit Enter to Proceed.
InformationSelect your disk based on it’s size. If you have multiple disks of the same size removing the extra disks is the safest way to proceed.WarningIf you do not see your disk here then you should seek professional data recovery services.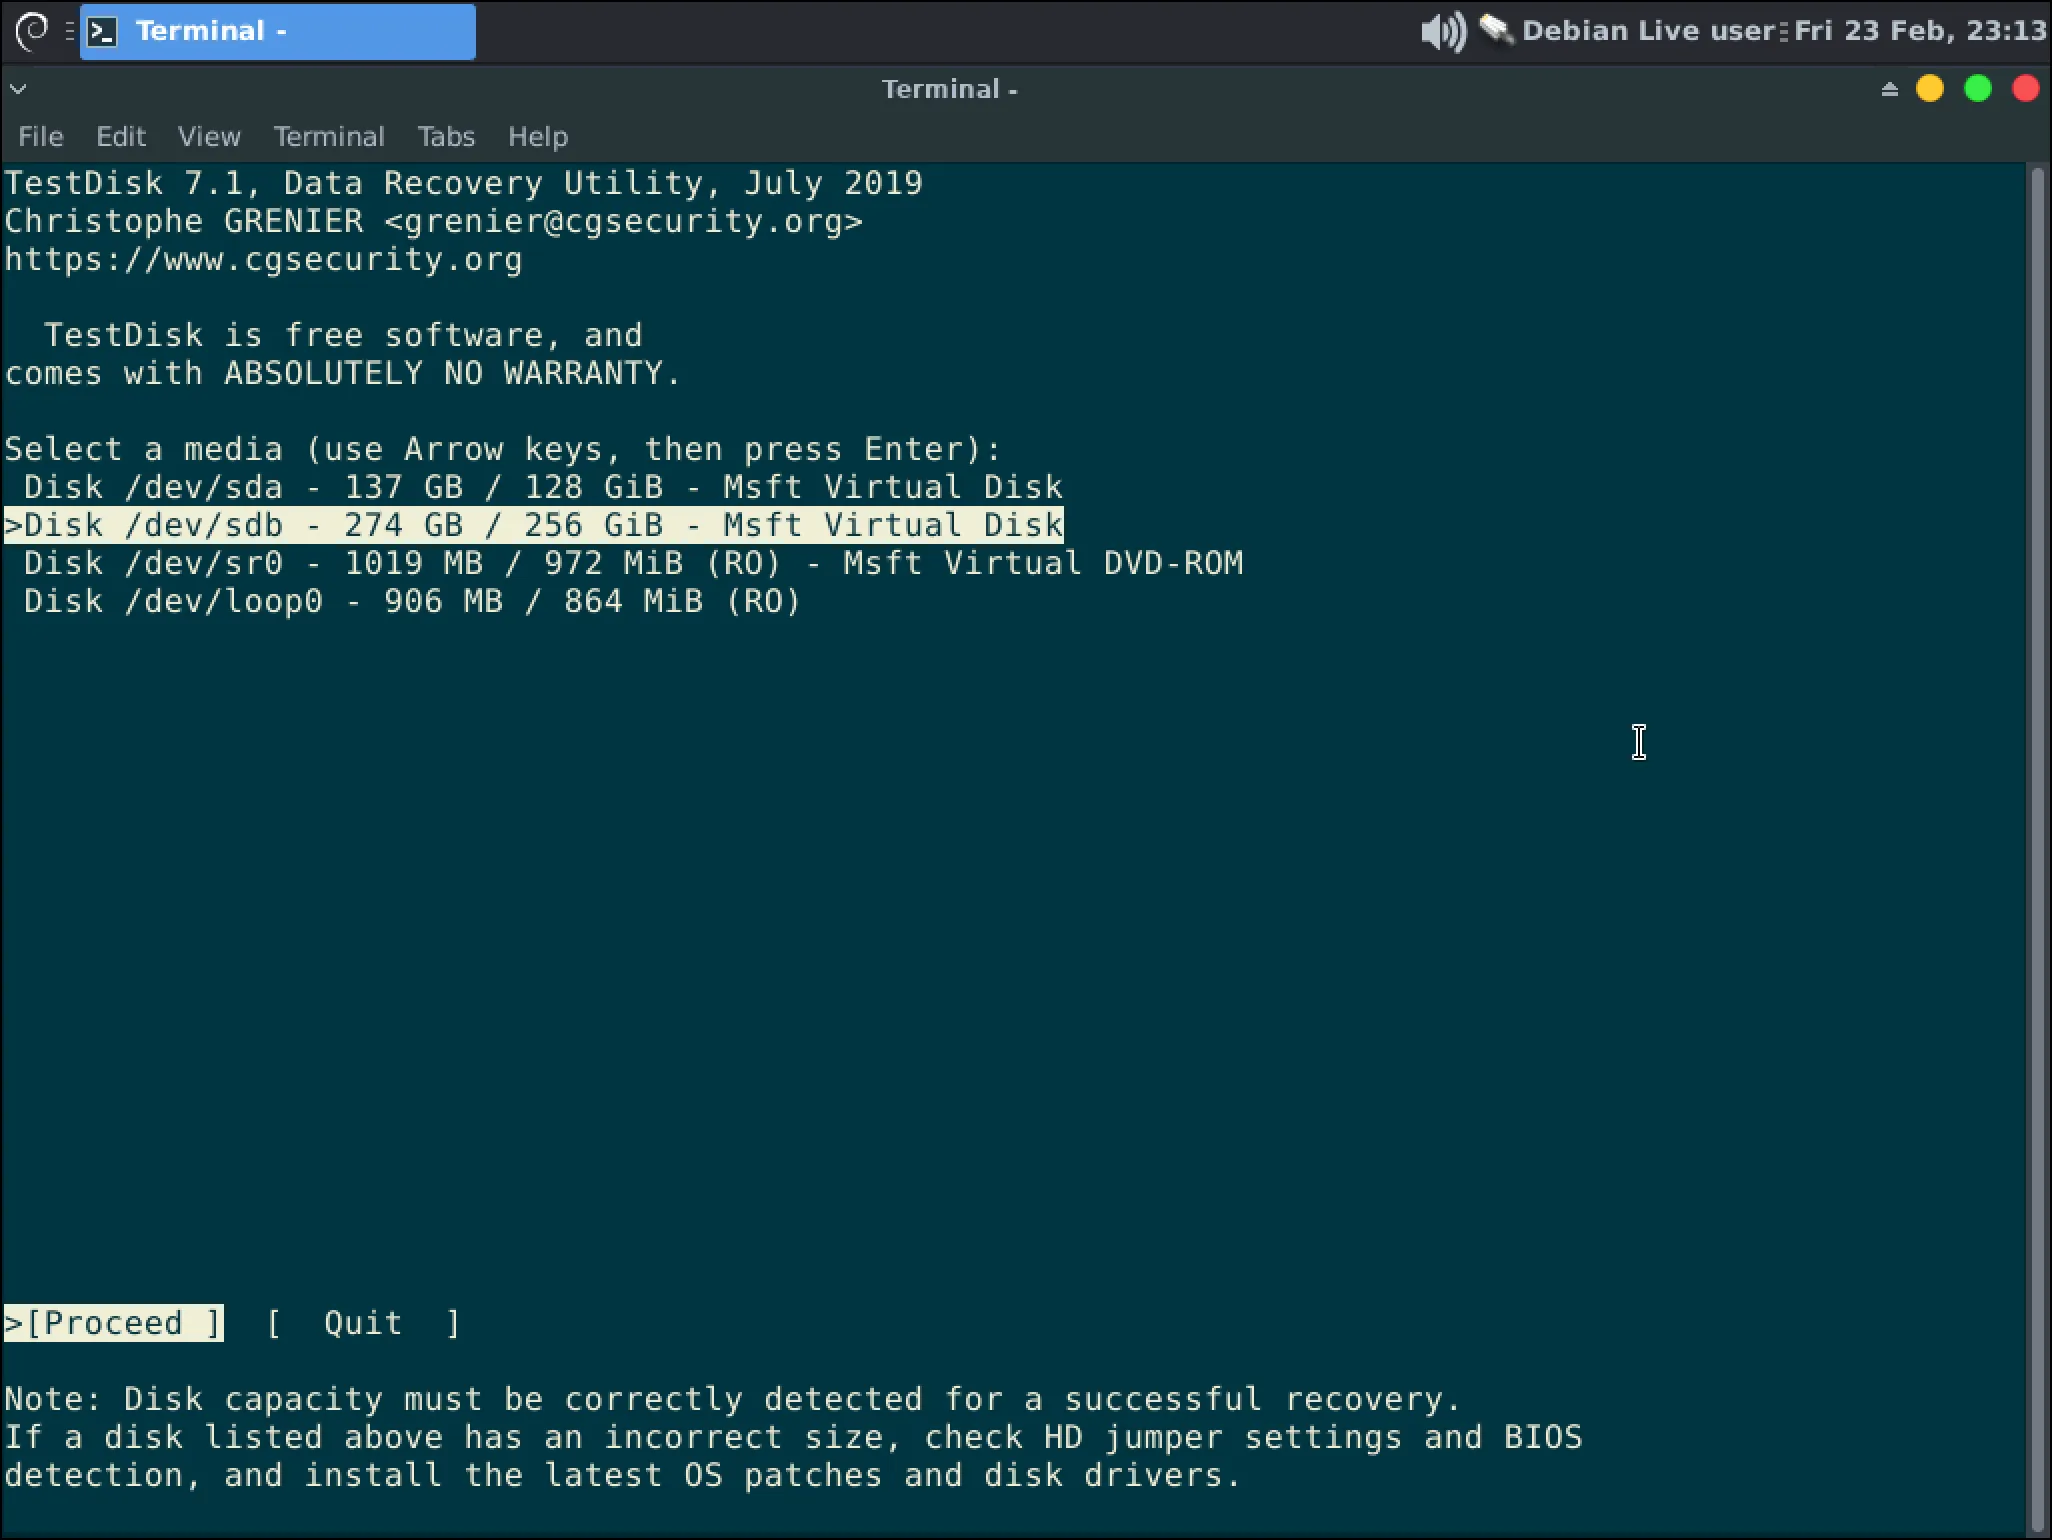
-
Testdisk will attempt to determine the partition table that is on the disk. If it is correct or if you do not know press Enter to proceed otherwise correct the selection.
InformationMost modern systems should be using a “EFI GPT” table type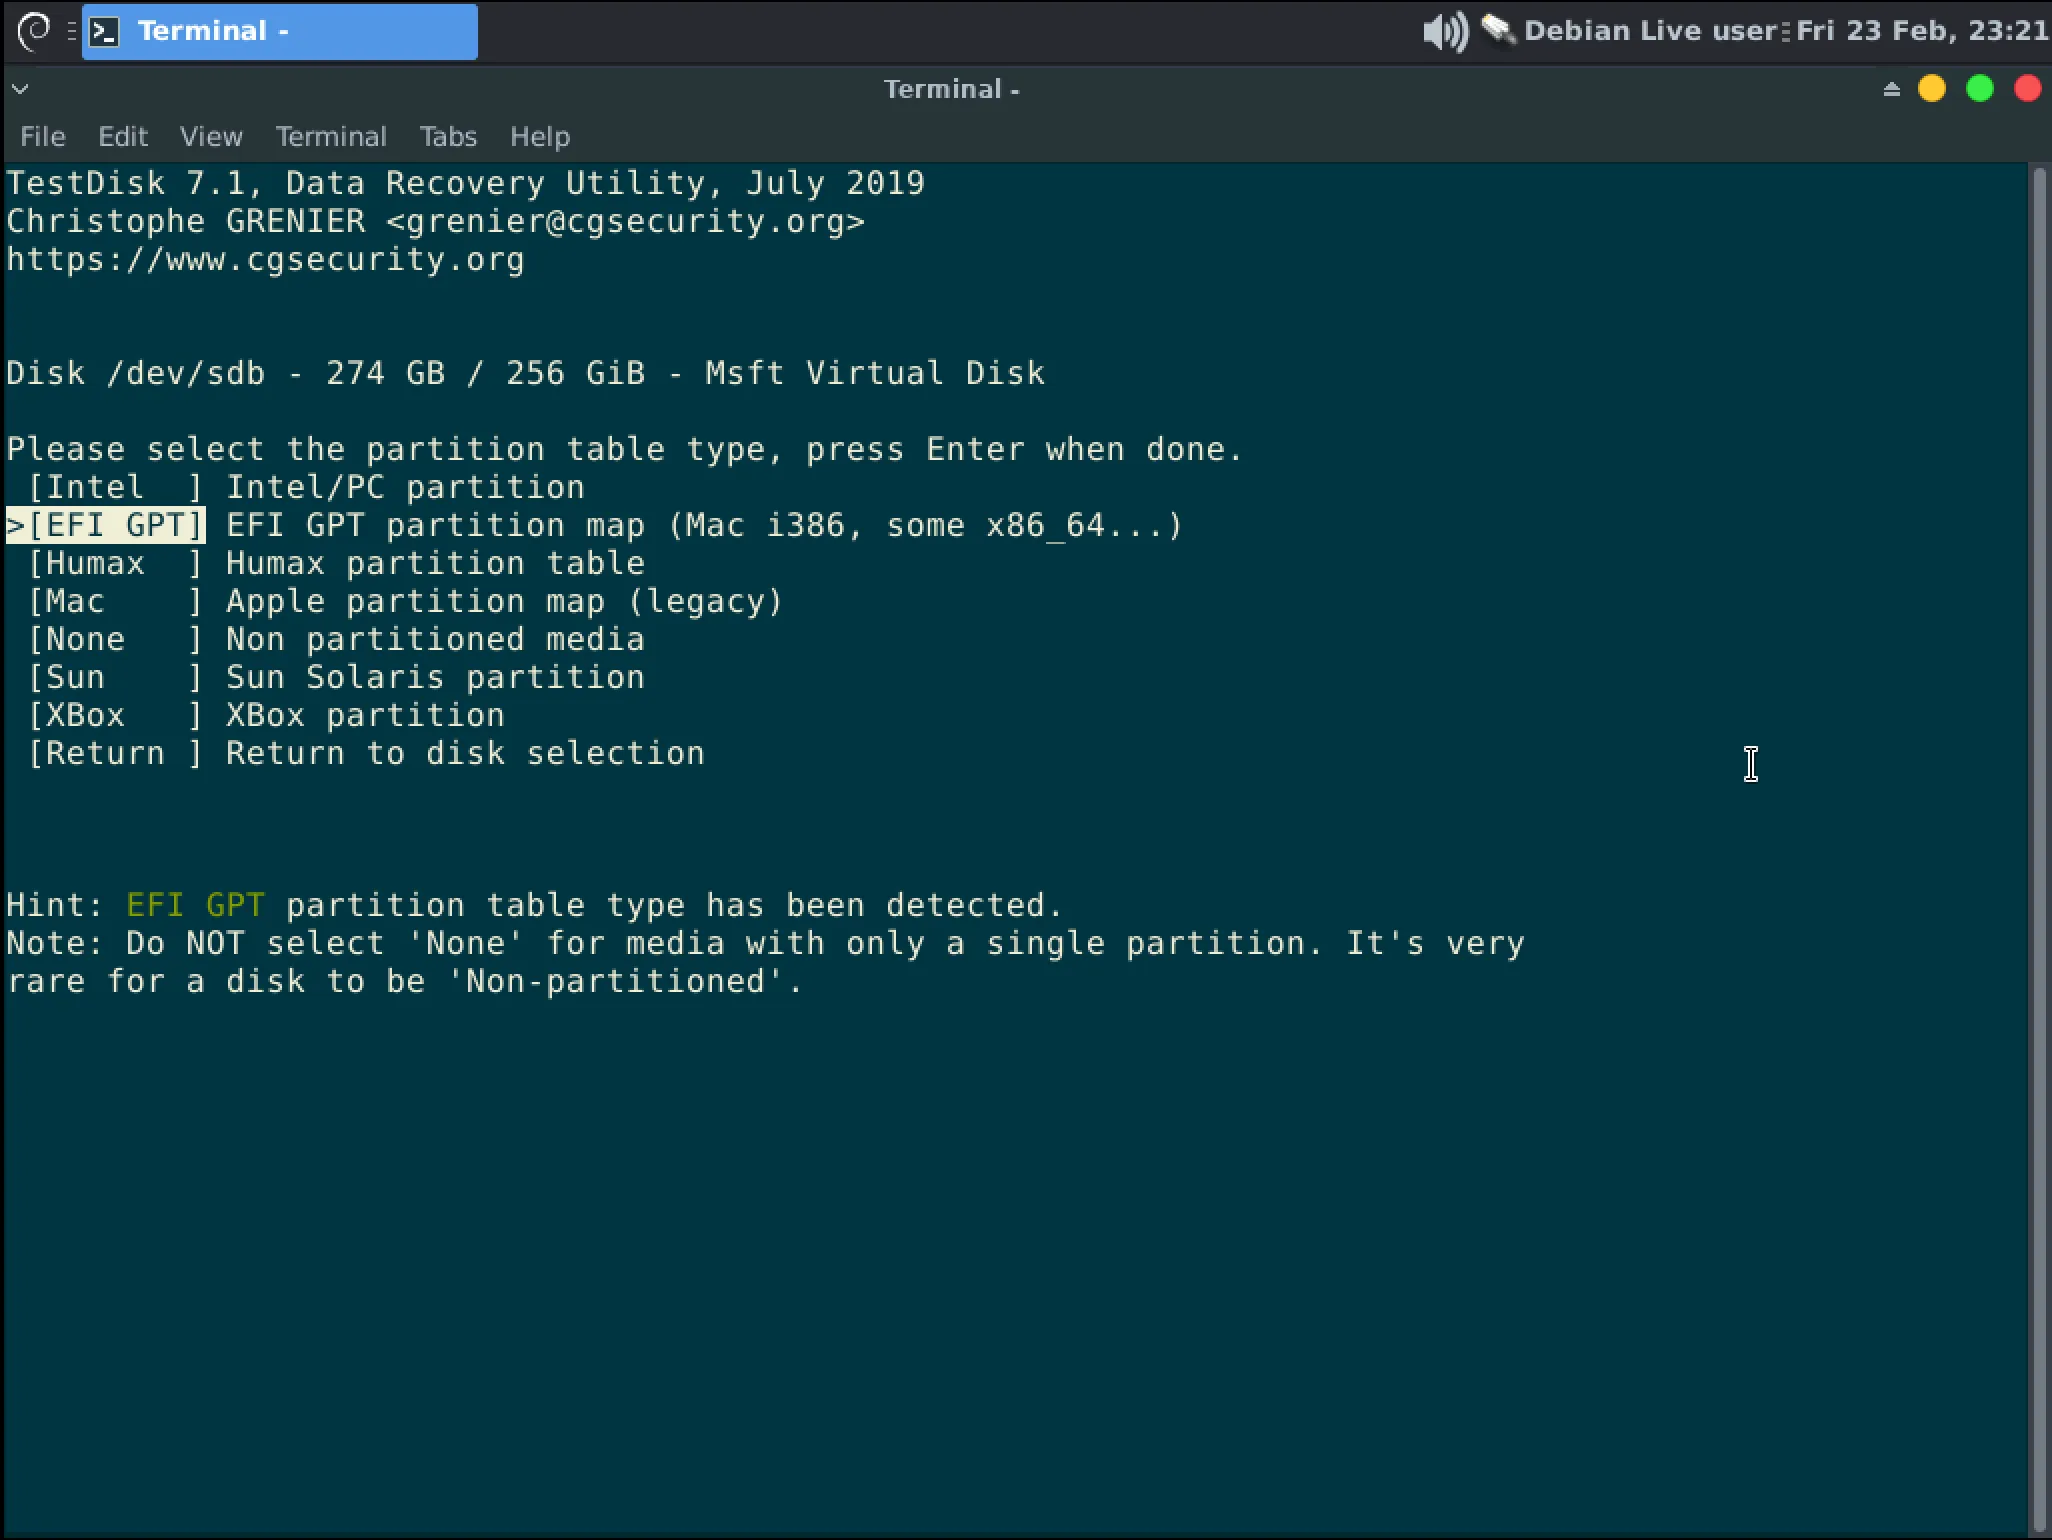
-
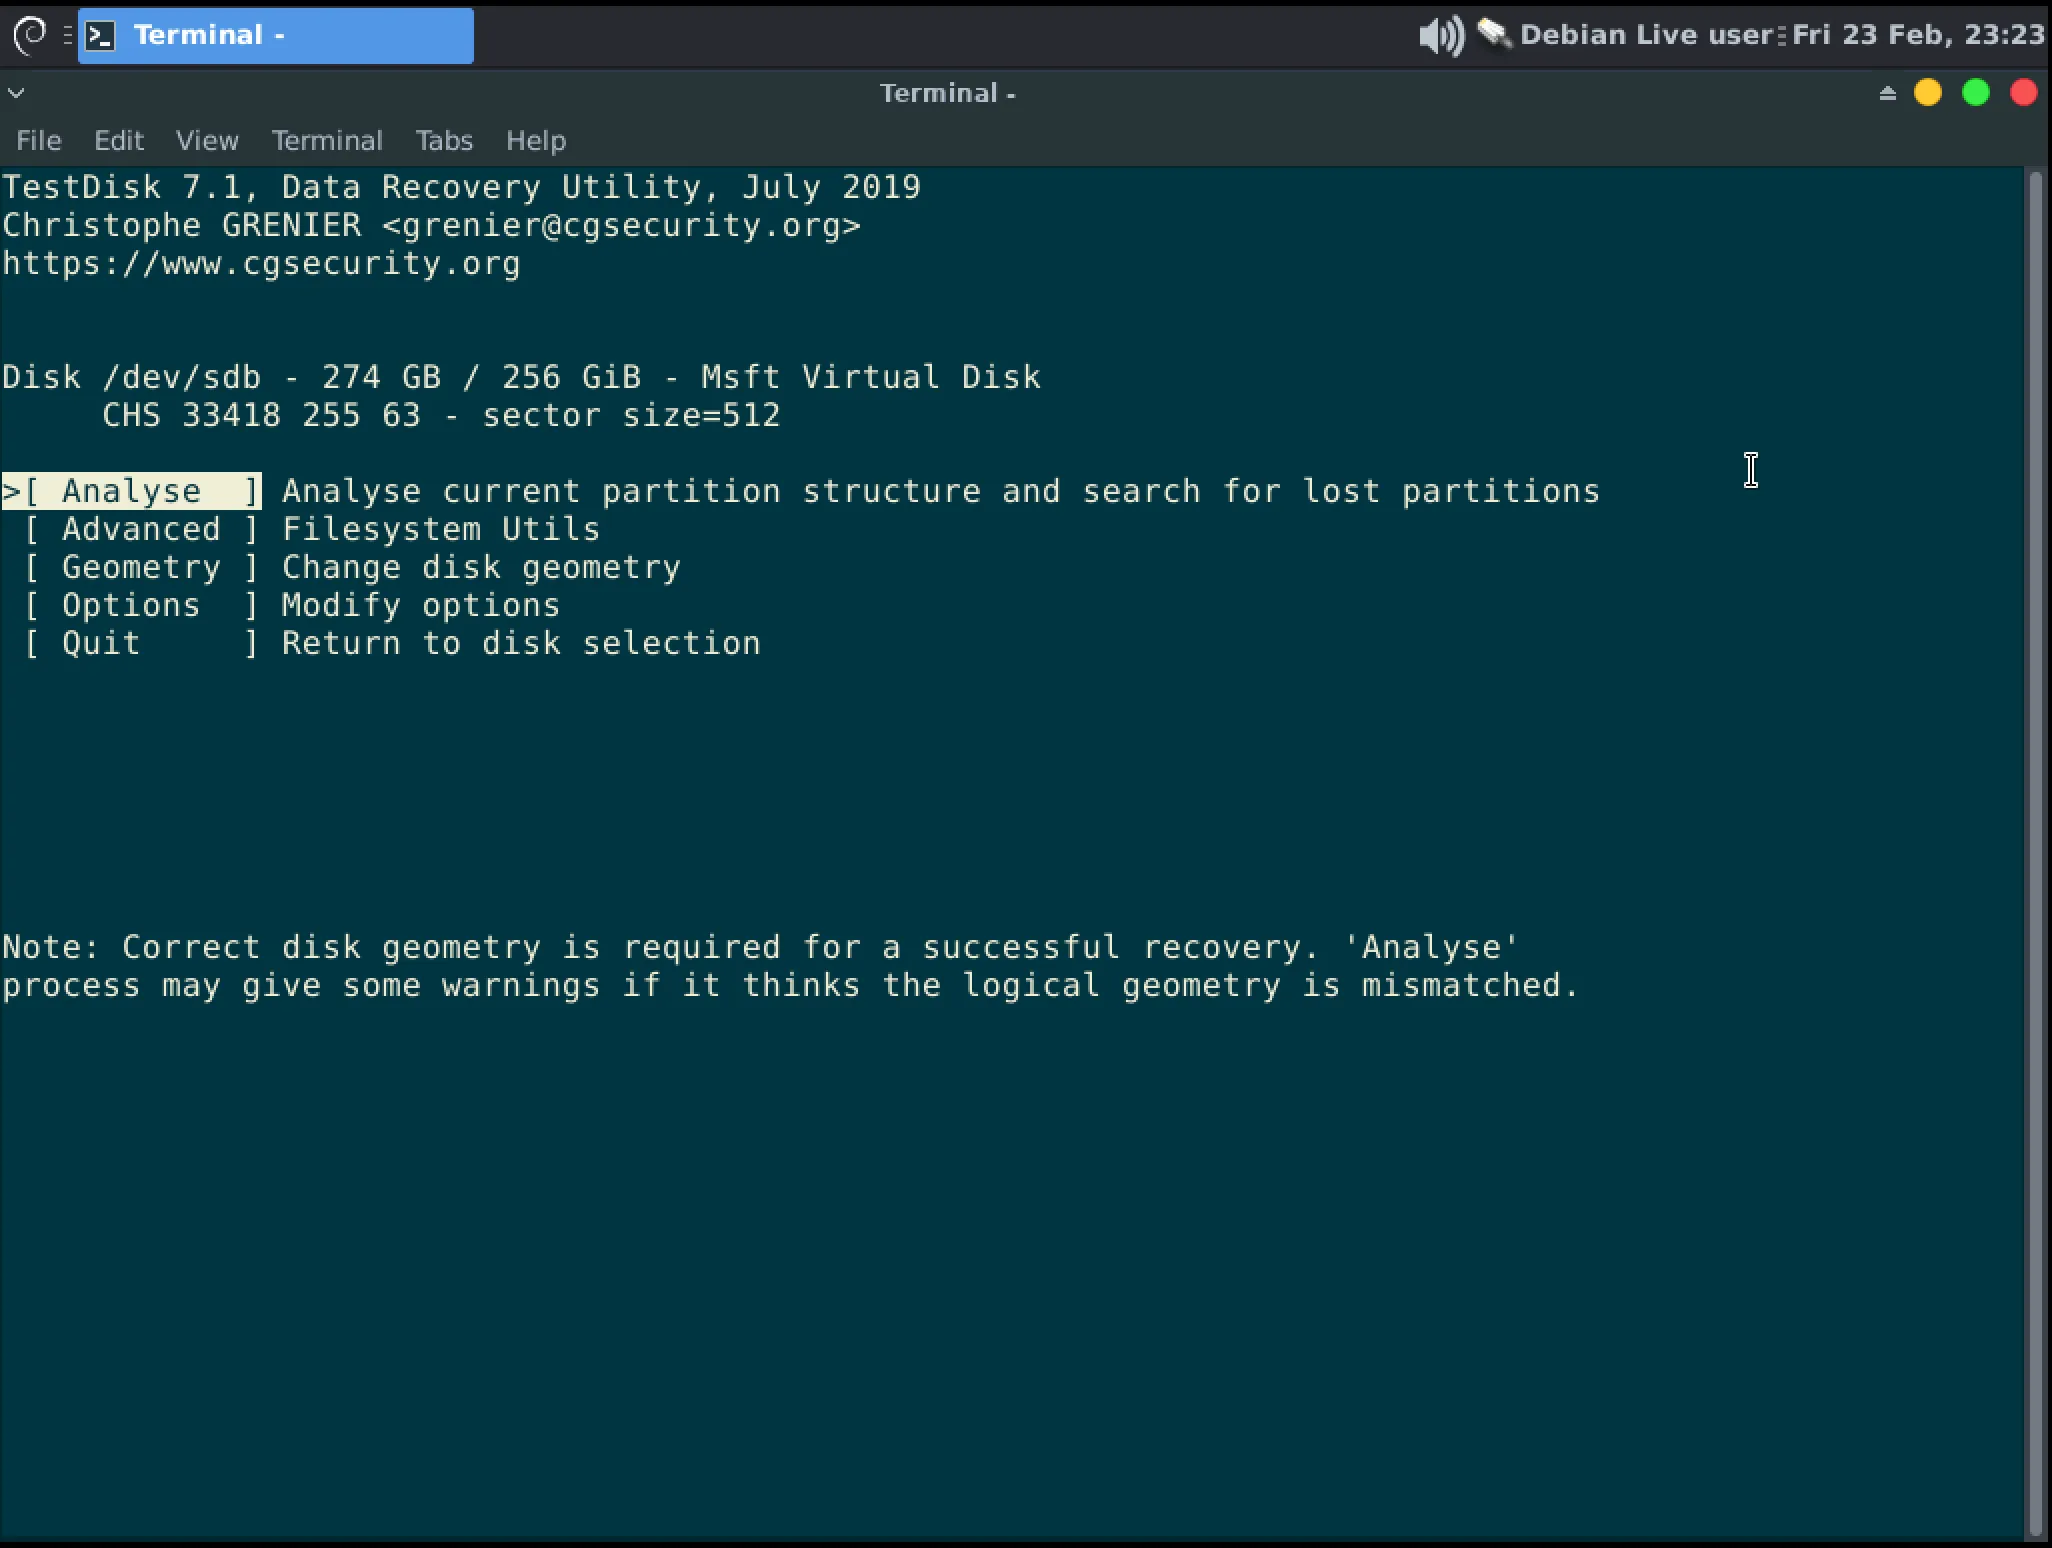
Press Enter to Analyze the disk
-
Press Enter to begin a “Quick Search”.
InformationYou may be told a partitions cannot be recovered. Make note of this and press “Continue”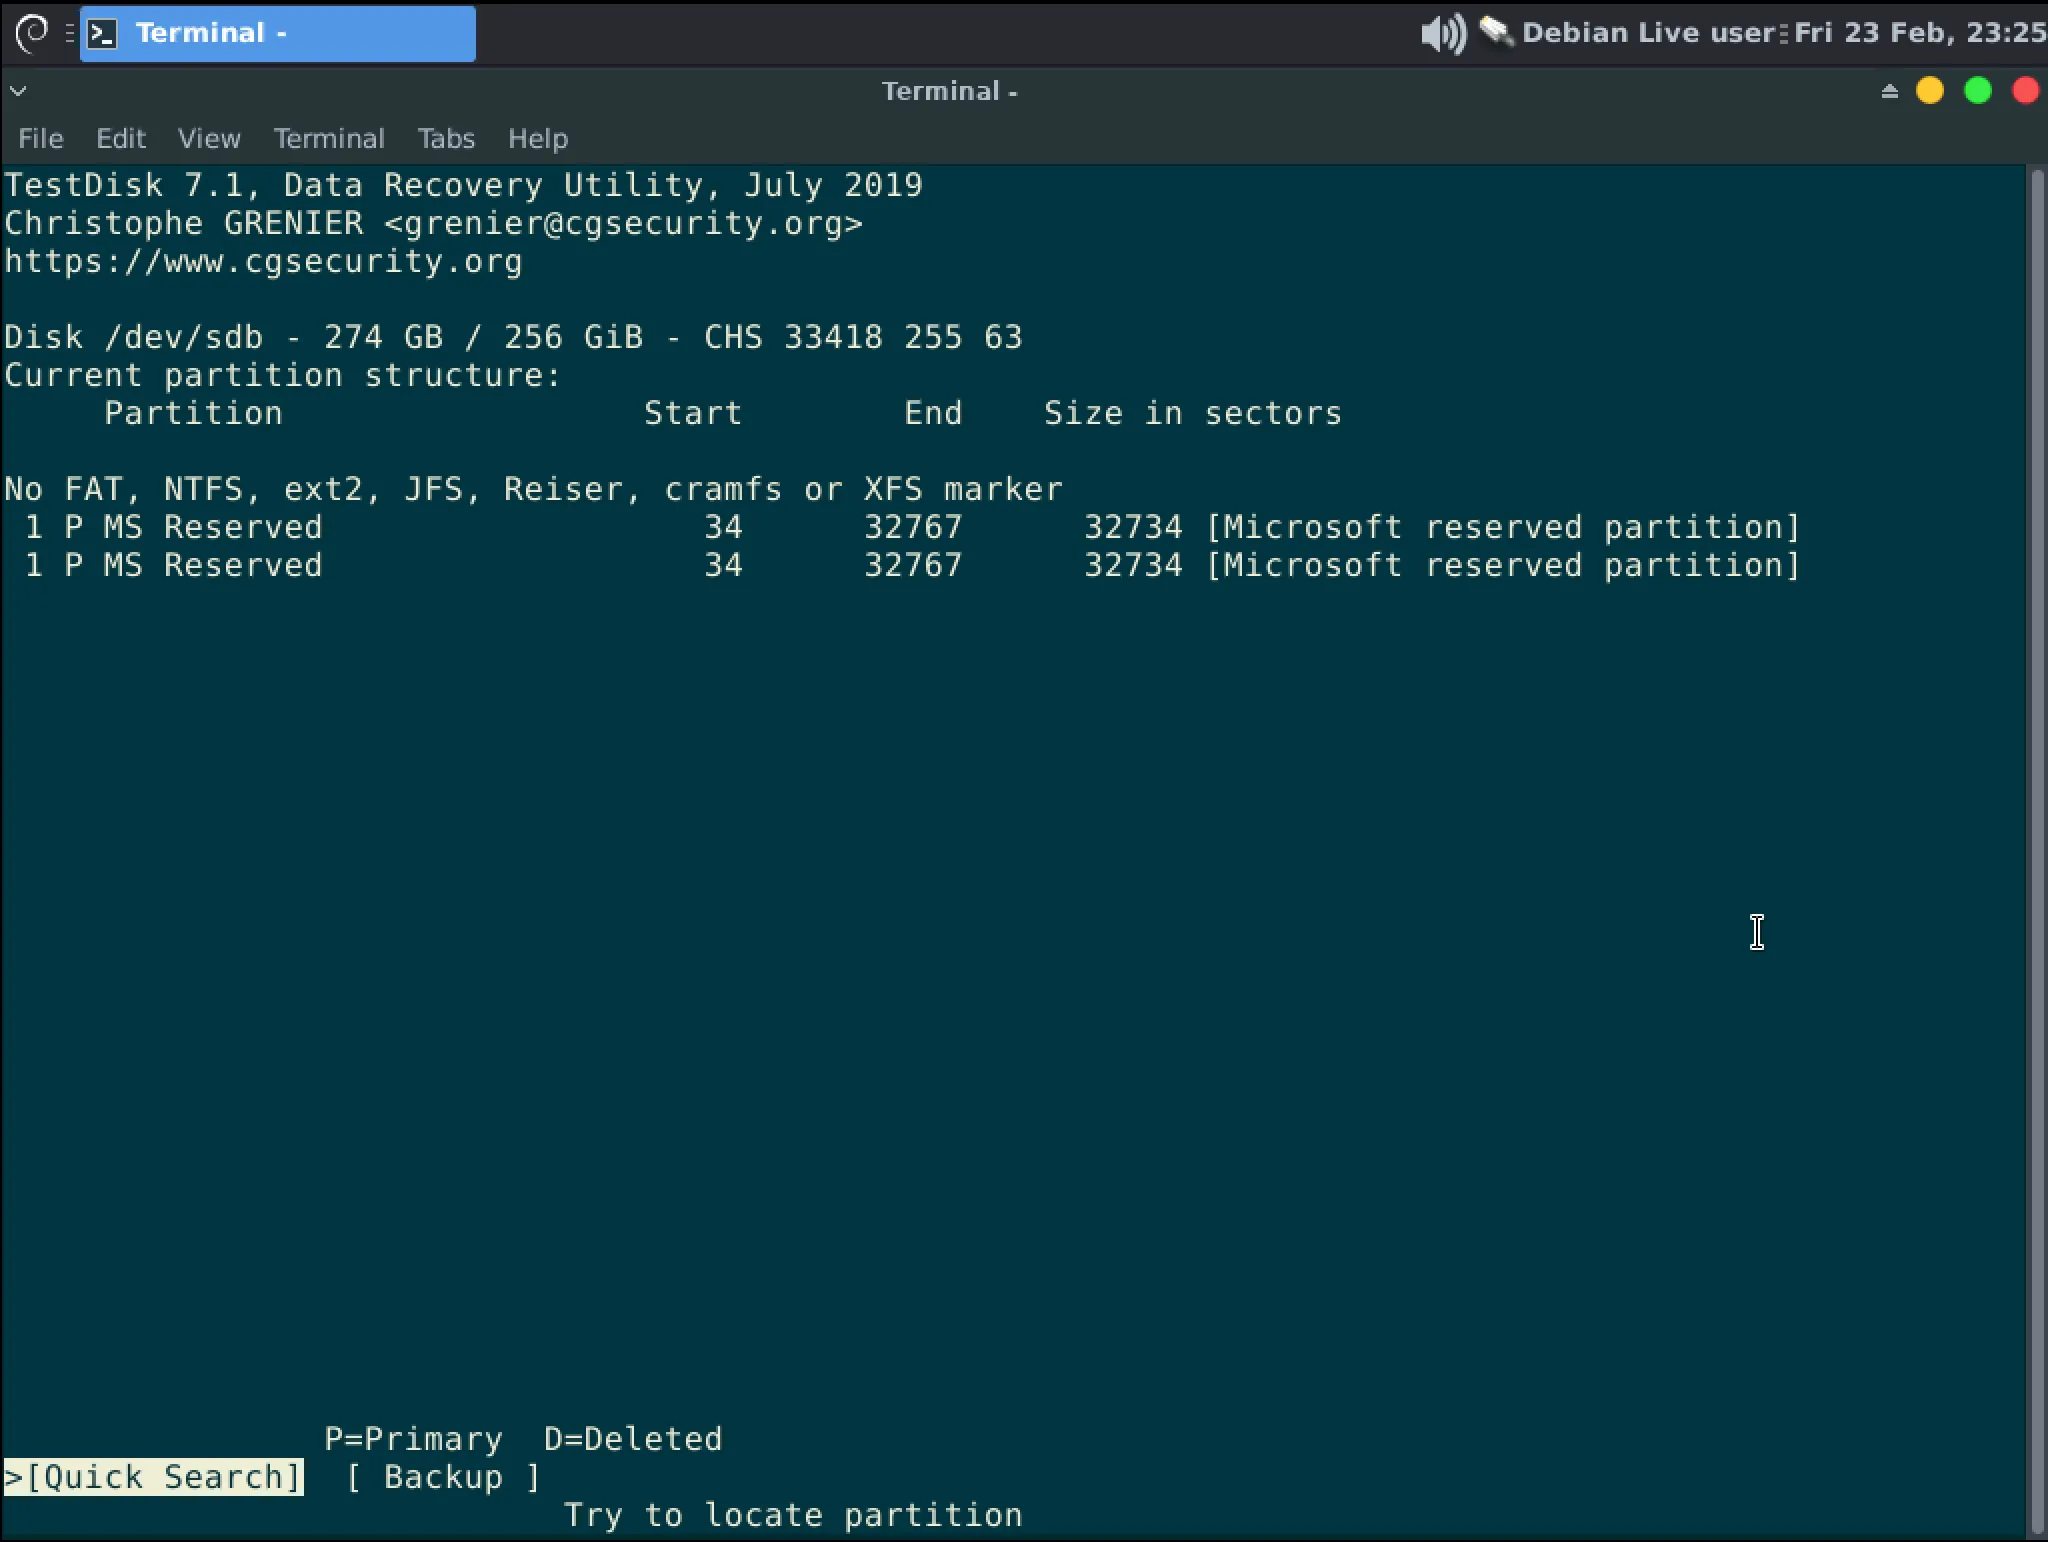
-
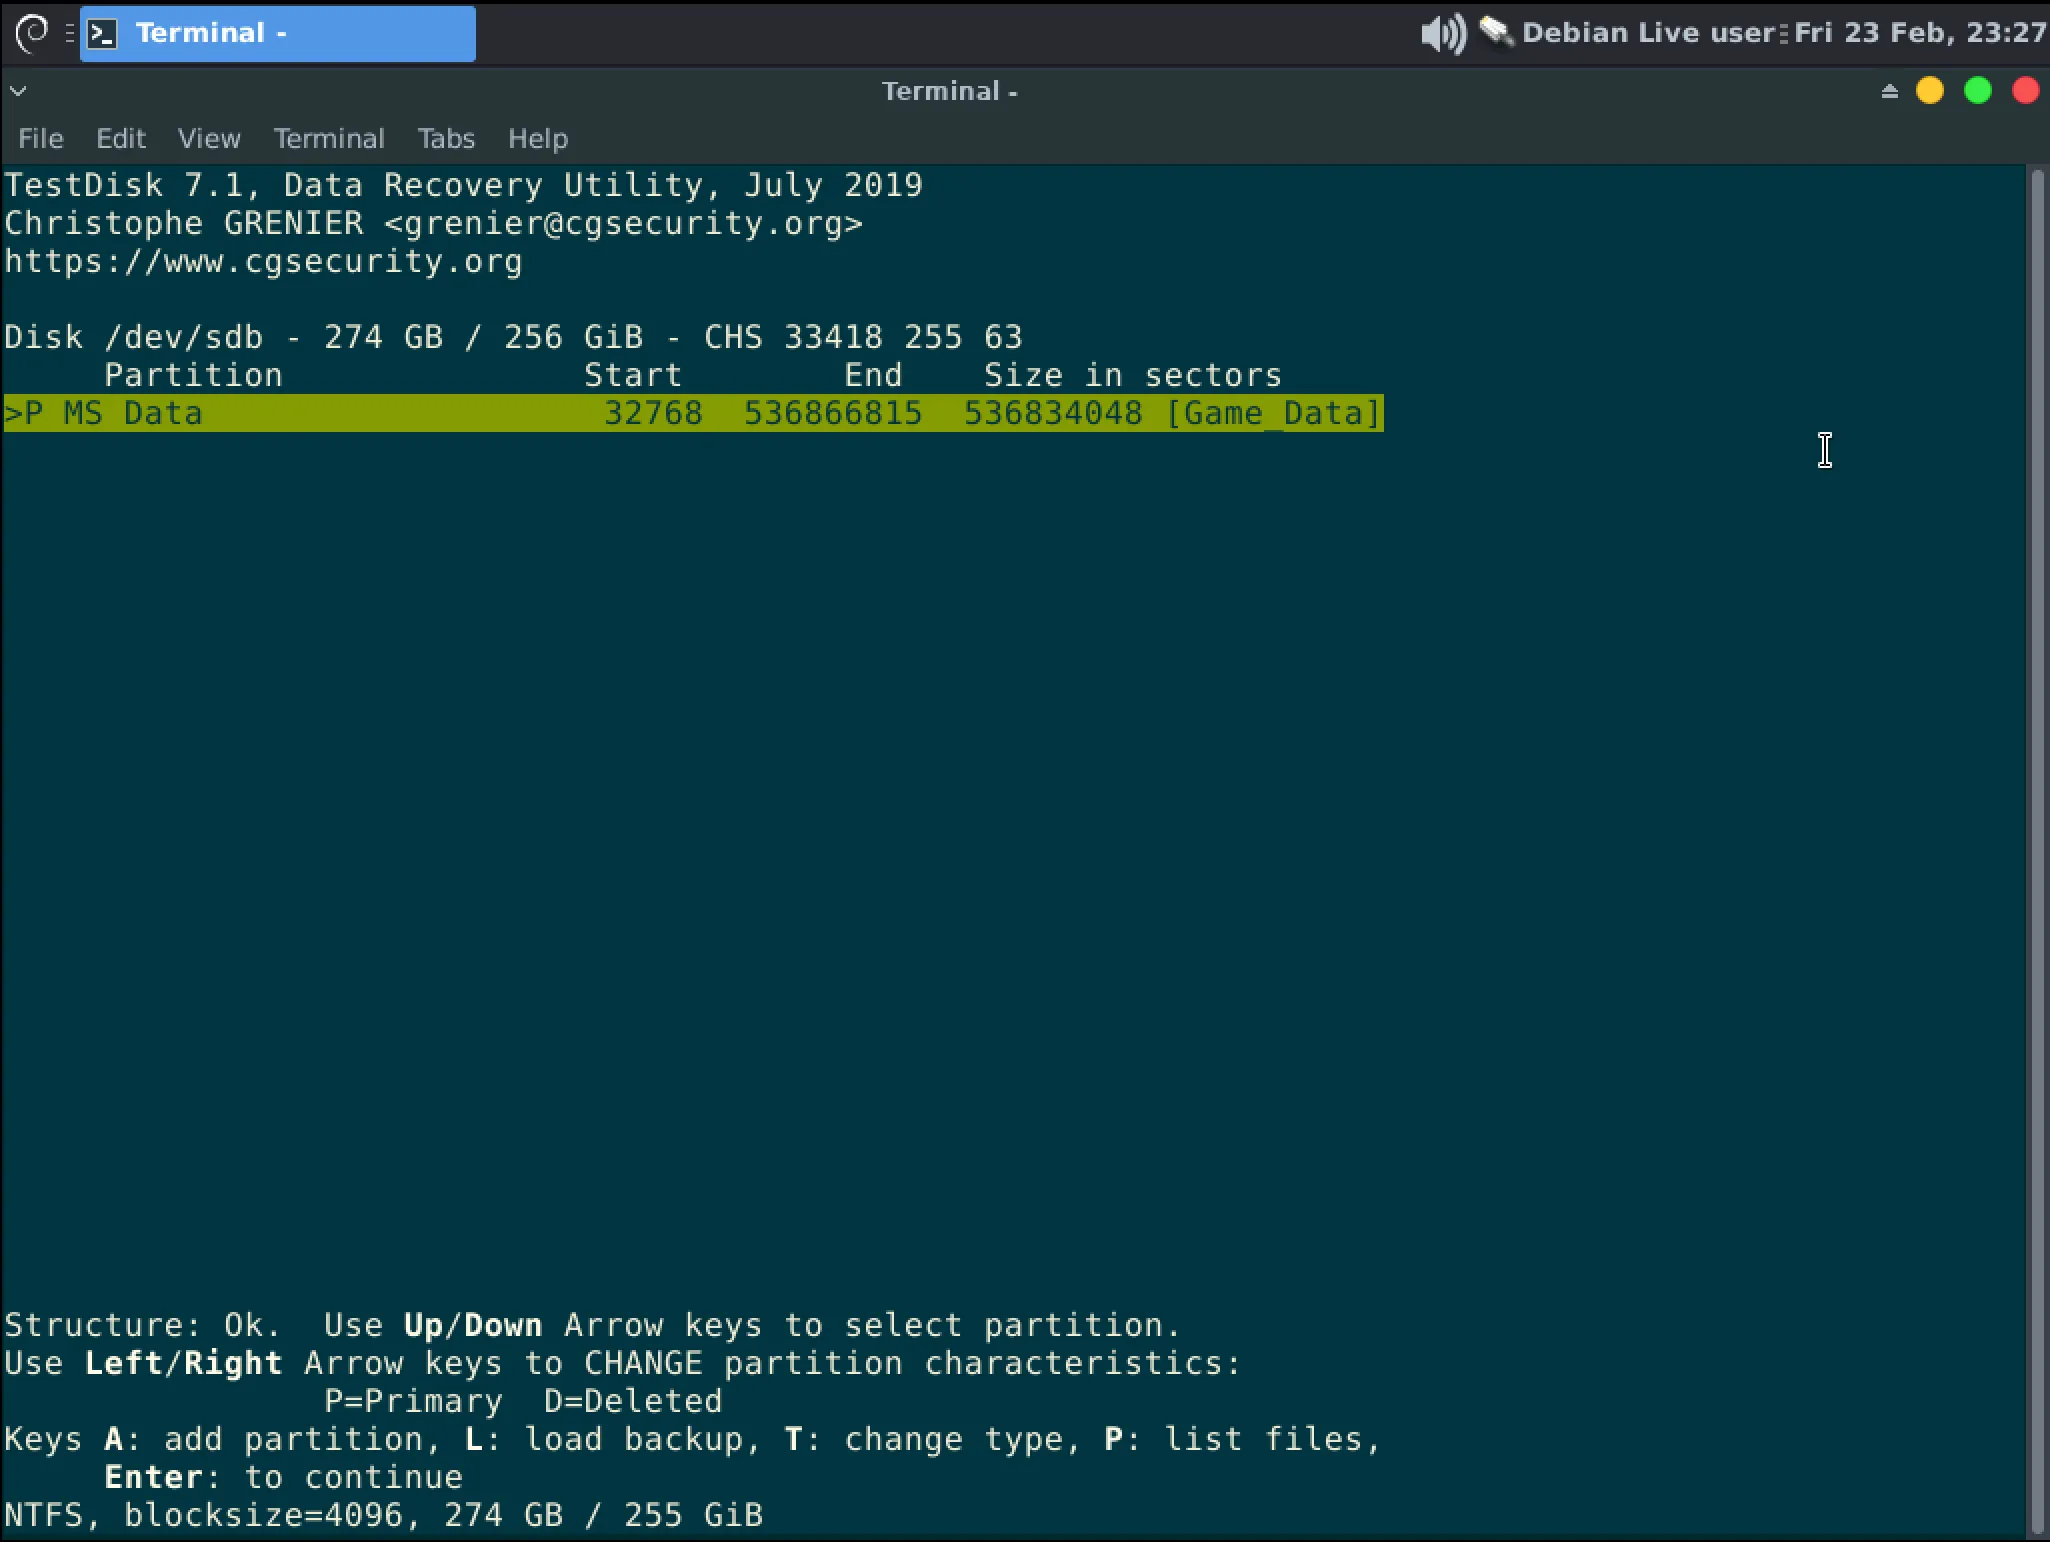
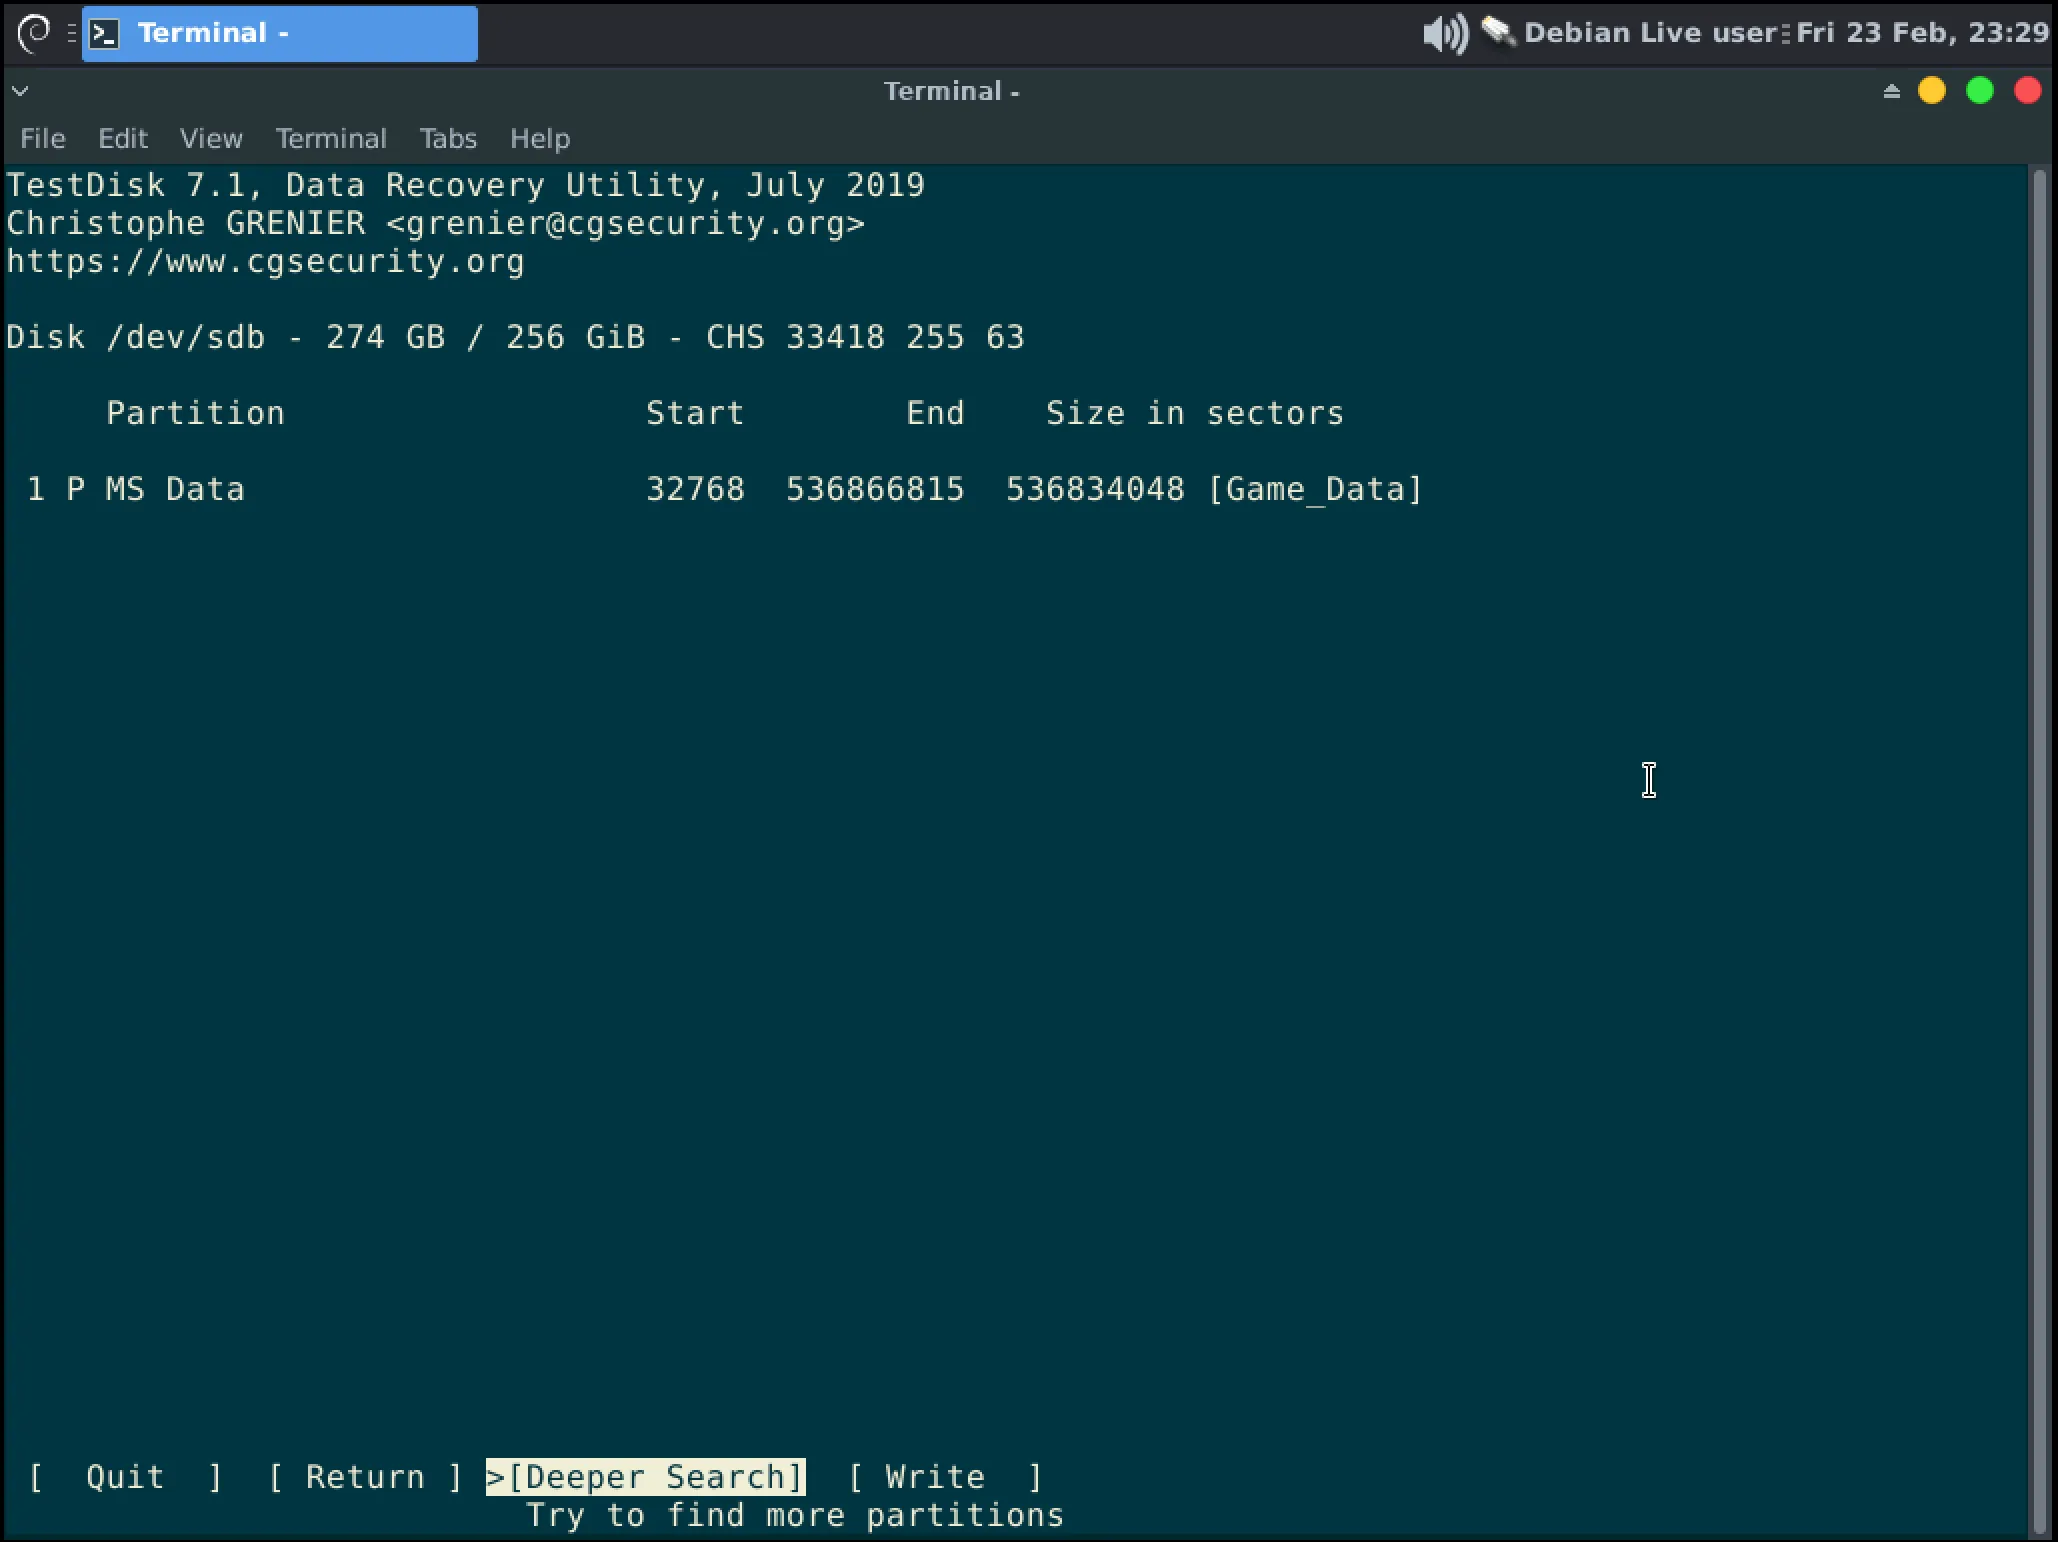
If you are lucky, Testdisk has found a partition. From here you can use “p” to list the files in the partition to confirm it is correct (Hit “q” to exit that view.) Then hit Enter to proceed to the next step.
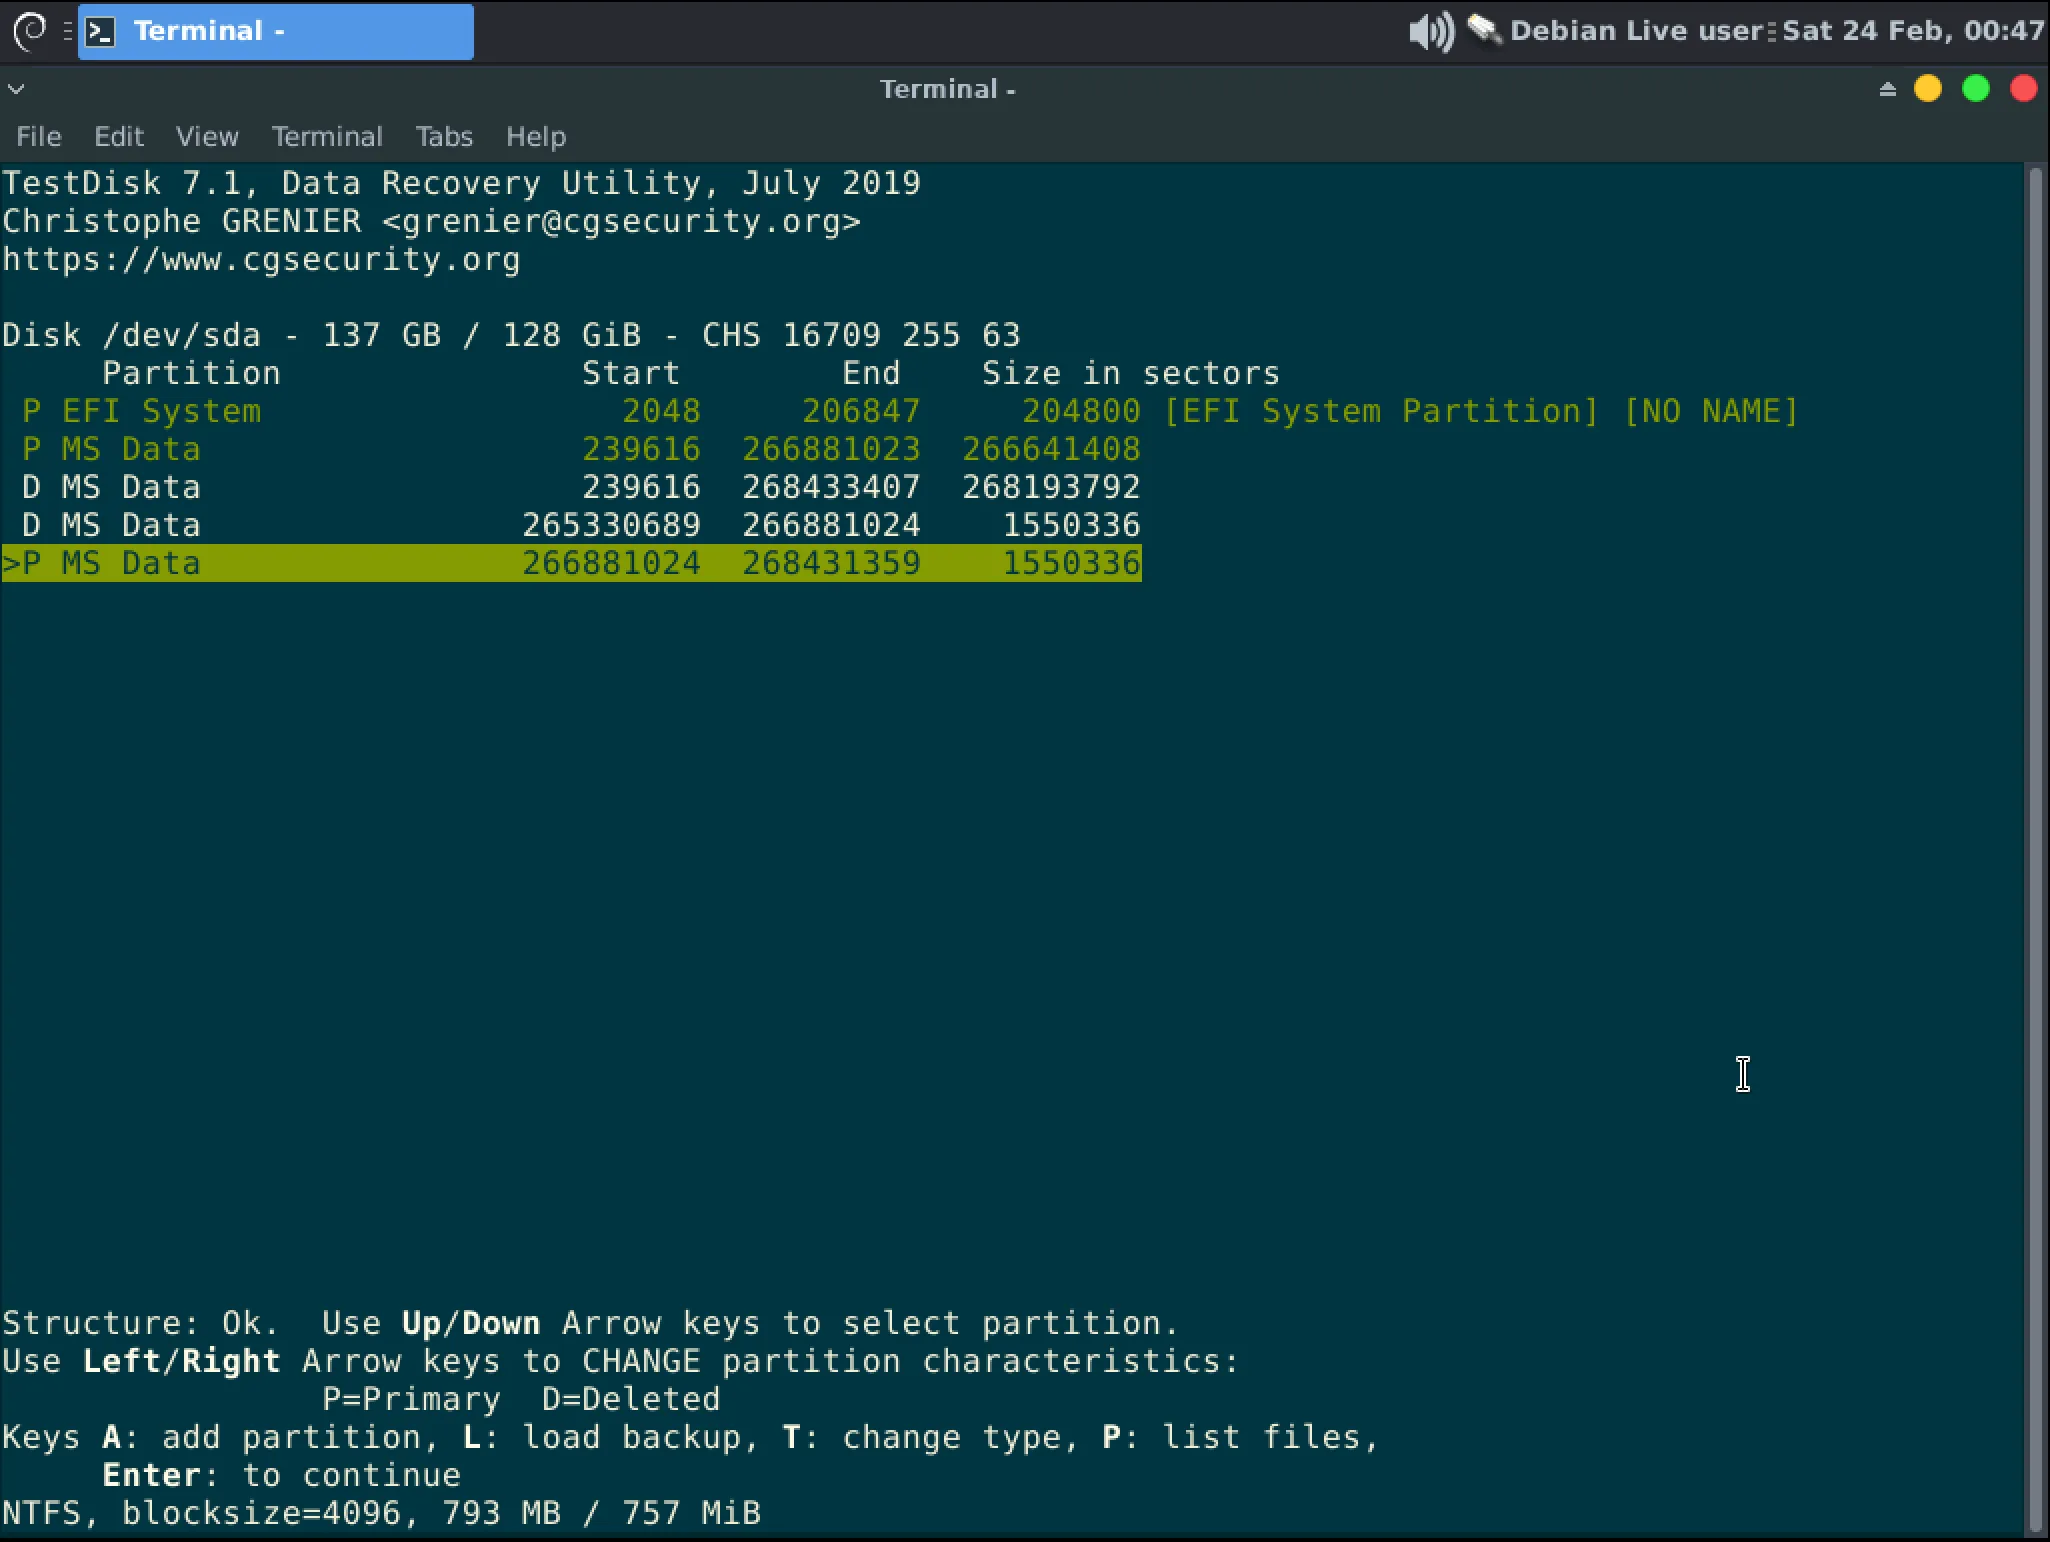
 InformationNotes on recovering multiple partitions
-
If multiple partitions are found you can use the arrow keys to move between them. Select the partitions you want to restore with the Space bar. Some of those partitions may be duplicates and some may be labeled “Found using backup sector
-
You may not be able to select all partitions, for instance duplicate partitions will make an error if both are selected.
-
Selected partitions are shown in green.
-
-
At this stage you can press Enter to “Deeper search” if this is not the correct partition or press the Right Arrow and Enter to “Write” the partition(s) to the disk.
 InformationAn example of multiple partitions being written
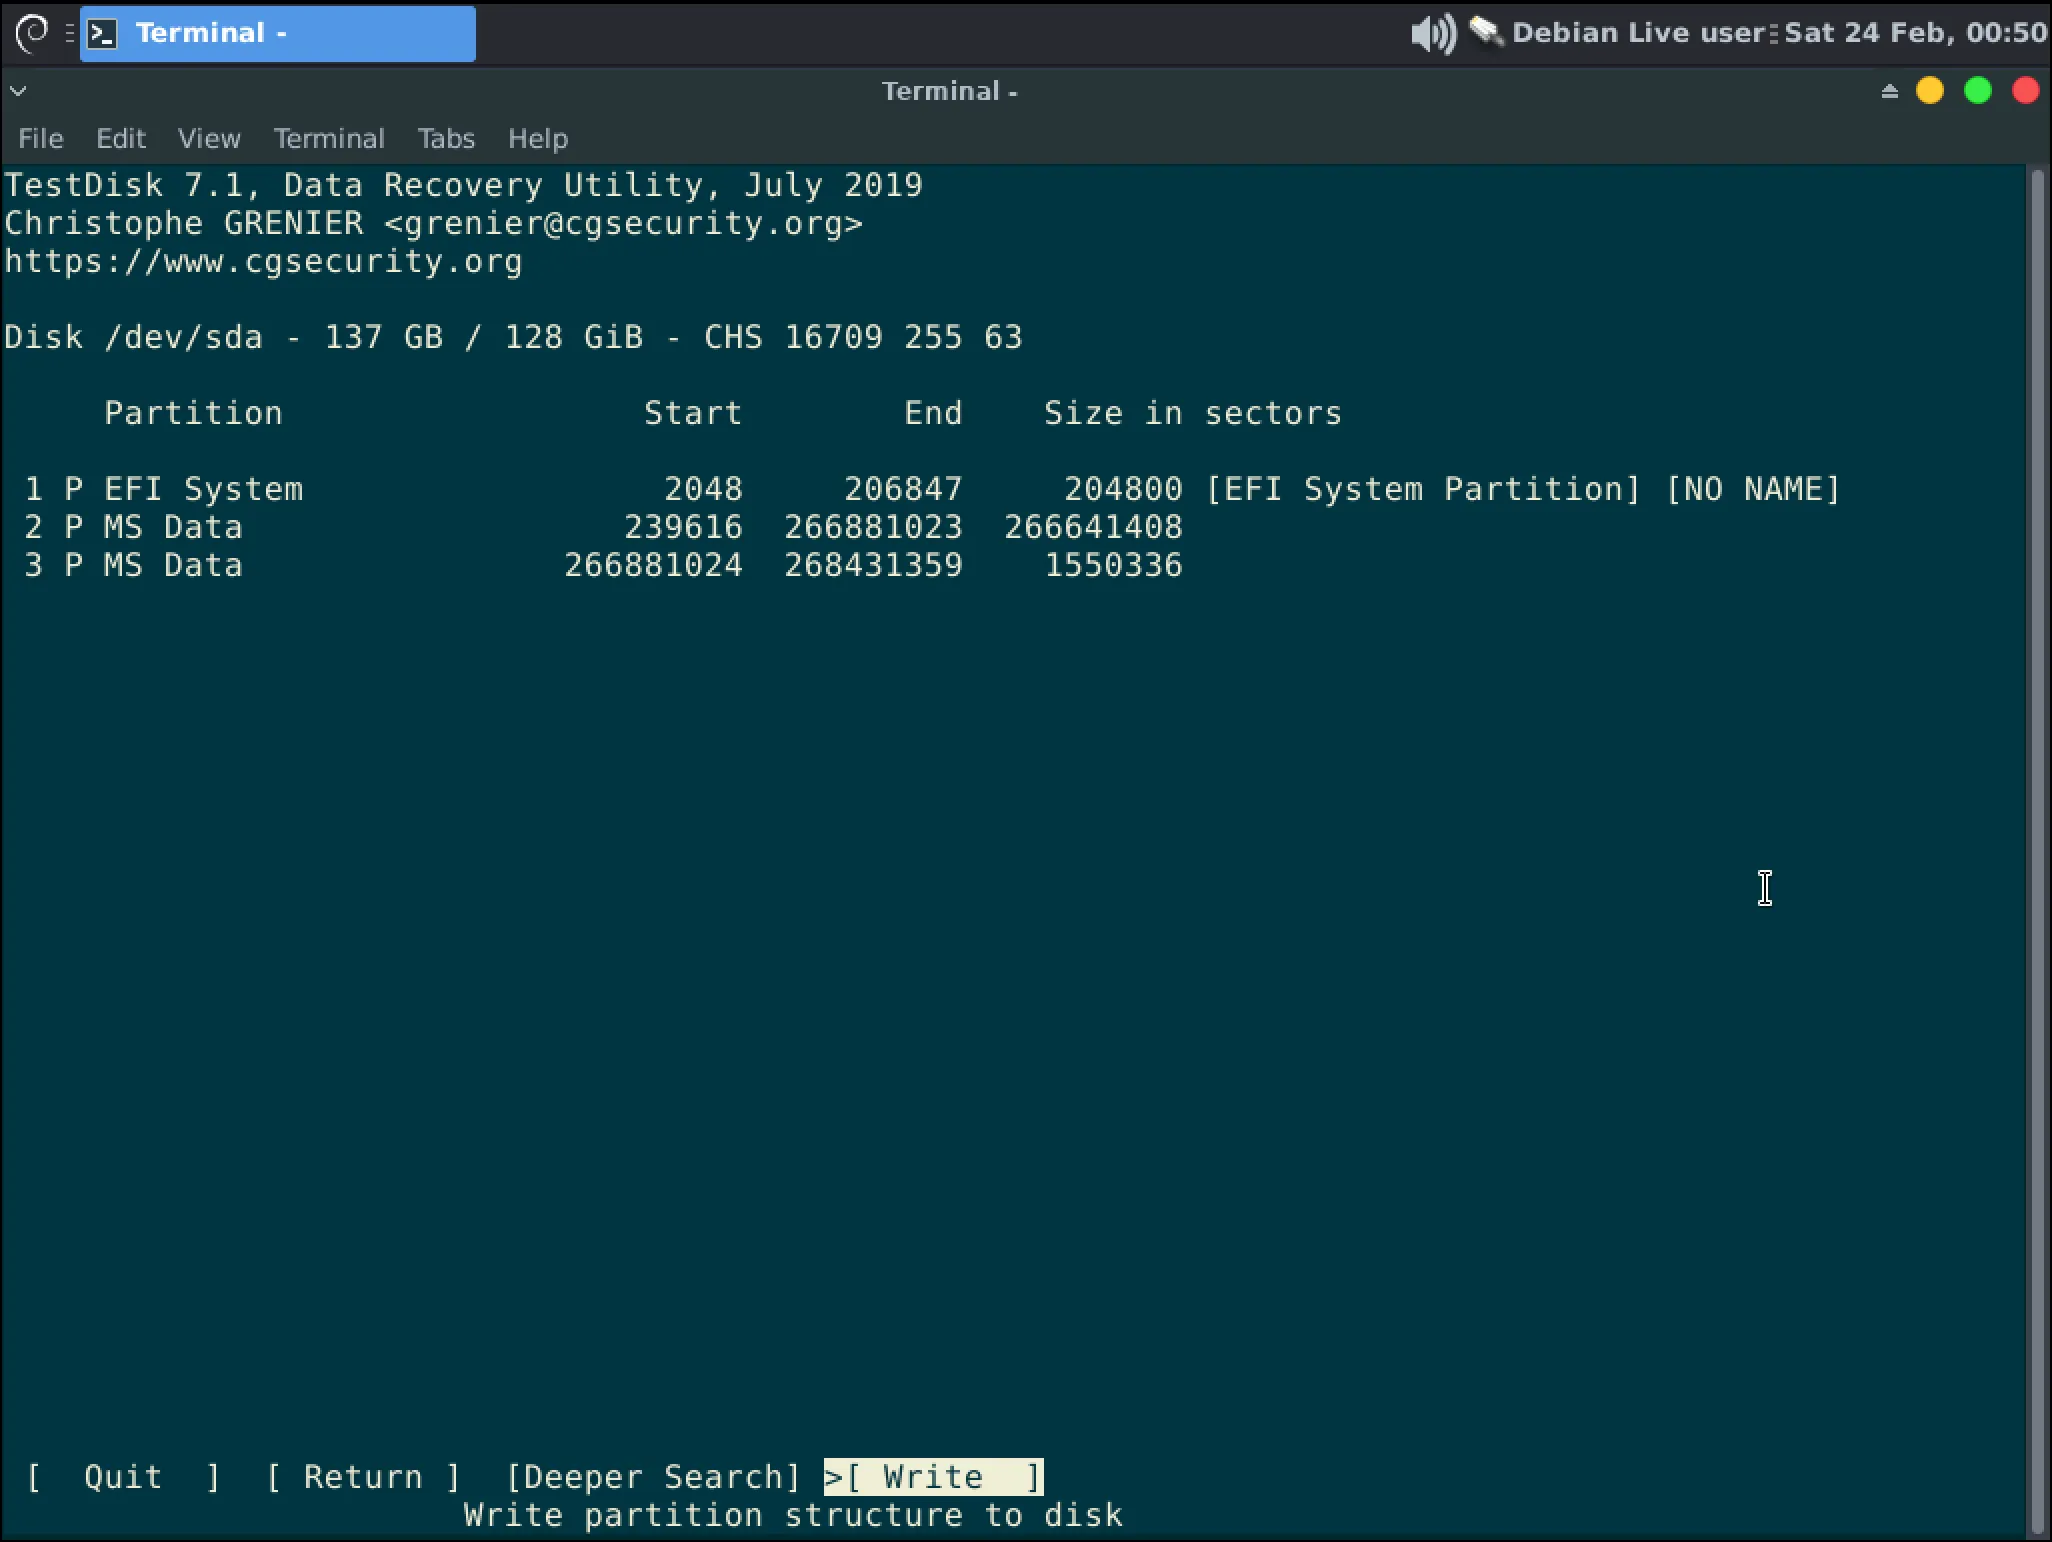
-
After writing the partition back to the disk you will be brought back to Step 6. You can close the terminal and shutdown your computer. Remove the USB then boot your computer again to validate if partition recovery was a success.
InformationIf you restored an OS disk, it most likely won’t be bootable but it is hopefully readable. You can refer to Recovering files from a readable disk for the next steps in recovering your data.
WarningAfter completing a partition or table recovery it is recommended you backup your data and properly reformat the disk. Follow Diskpart clean directions to do that.